WHAT’S YOUR PERSPECTIVE? 4
WHAT’S YOUR PERSPECTIVE?
Learning Description
In this lesson, students will create a Calder-inspired mobile that explores positive and negative perspectives. Students begin by reflecting on experiences from different viewpoints and discuss how perspective affects perception. They will examine how color can convey mood by looking at Jim Dine’s works, then select color schemes to represent positive and negative perspectives. This lesson emphasizes reflection, creativity, and the expressive potential of color and form.
Learning Targets
"I Can" Statements
“I Can…”
- I can reflect on experiences from positive and negative perspectives.
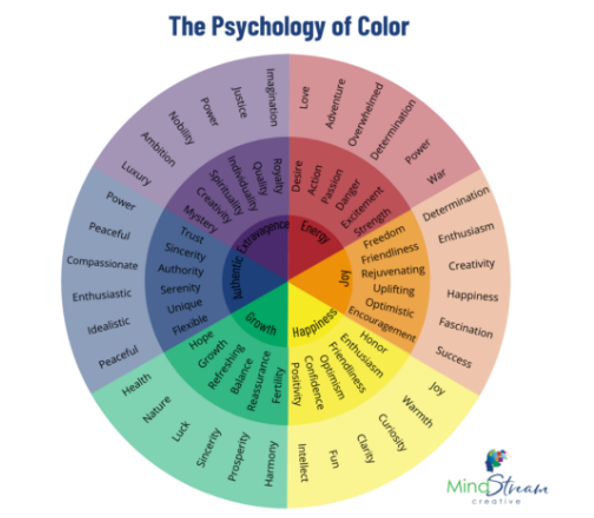
- I can choose and apply color schemes to express different moods.
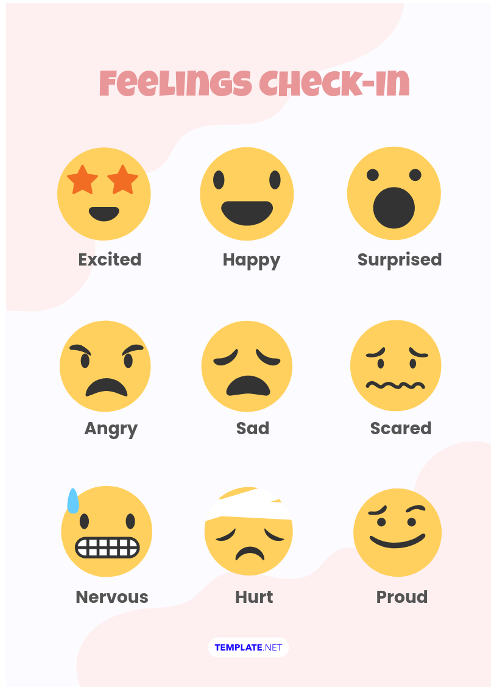
- I can represent personal feelings through art.
Essential Questions
- How can perspective (positive or negative) change the way we see an experience?
- How does color affect the mood or feeling of an artwork?
- In what ways can art represent personal experiences or feelings?
Georgia Standards
Curriculum Standards
HE4.1 Students will comprehend concepts related to health promotion and disease prevention to enhance health.
HE4.1.c Describe basic health concepts of mental and emotional well-being.
Arts Standards
VA4.CR.1 Engage in the creative process to generate and visualize ideas by using subject matter and symbols to communicate meaning.
VA4.PR.1 Plan and participate in appropriate exhibition(s) of works of art to develop identity of self as artist.
VA4.CR.5 Demonstrate an understanding of the safe and appropriate use of materials, tools, and equipment for a variety of artistic processes.
VA4.RE.1 Use a variety of approaches for art criticism and to critique personal works of art and the artwork of others to enhance visual literacy.
VA4.CN.3 Develop life skills through the study and production of art (e.g. collaboration, creativity, critical thinking, communication).
South Carolina Standards
Curriculum Standards
Standard 2: “Students will analyze the influence of family, peers, culture, media, technology, and other factors on health behaviors” (NHES, 2007).
I-4.2.1 Analyze ways that protective factors promote health and safety (e.g., positive outlook, healthy self-concept, good relationships with parents).
Arts Standards
Anchor Standard 1: I can use the elements and principles of art to create artwork.
Benchmark VA.CR I can combine several elements of art to express ideas.
Indicator VA.CR NM.1.2 I can combine several elements of art to construct 2D or 3D artwork.
Anchor Standard 2: I can use different materials, techniques, and processes to make art.
Benchmark VA.CR NM.2 I can use some materials, techniques, and tools to create artwork.
Indicator VA.CR NM.2.2 I can use three-dimensional art materials and techniques to make art.
Anchor Standard 4: I can organize work for presentation and documentation to reflect specific content, ideas, skills, and or media.
Benchmark VA.P NL.4 I can show and describe the idea of my artwork.
Indicator VA.P NL.4.2 I can describe my artwork.
Key Vocabulary
Content Vocabulary
- Positive - A viewpoint, attitude, or experience that focuses on benefits, opportunities, or constructive aspects
- Negative - A viewpoint, attitude, or experience that focuses on drawbacks, challenges, or problems
- Perspective - A particular way of looking at or thinking about something; a viewpoint or attitude that influences how a person sees and interprets experiences
Arts Vocabulary
- Mobile - A type of hanging sculpture made of balanced or suspended parts that move freely in the air
- Color scheme - A planned combination of colors used together in artwork to create a certain look, mood, or effect
Materials
- Example of a mobile by Alexander Calder, such as, “Mariposa”
- Examples of Jim Dine’s work that have different color schemes, such as “Four Hearts” and “Two Hearts in a Forest”
- 12x18 white mixed media (or heavier) paper
- Templates of circles in multiple sizes
- Tempera paint or watercolors
- Water cups
- Paint brushes
- Popsicle sticks (two per student)
- Yarn in various colors
Instructional Design
Opening/Activating Strategy
- Show students an example of a mobile by Alexander Calder, such as, “Mariposa”.
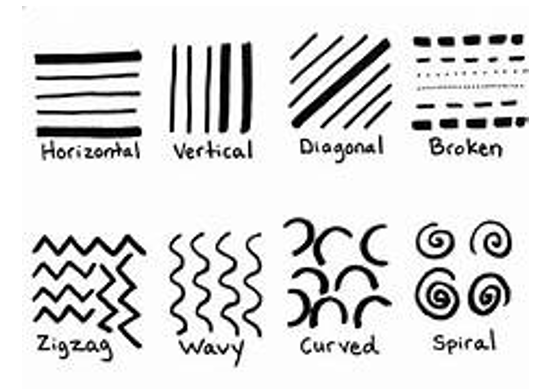
- Lead students through the Shapes / Lines / Colors Artful Thinking Routine.
- Tell students to look at the artwork. Ask them to discuss:
- What colors do you see?
- What shapes do you see?
- What lines do you see?
- Tell students to look at the artwork. Ask them to discuss:
Work Session
- Tell students that they will be creating a mobile inspired by Calder that represents a positive and a negative perspective.
- First, discuss what the words “positive” and "negative" mean.
- Next, ask students to reflect on an experience that they could have looked at with a positive perspective or with a negative perspective. Ask them which they chose. Ask them to consider how their experiences might have been different if they had looked at it from the other perspective.
- Provide time for students to share with a partner.
- Show students two examples of Jim Dine’s work that have different color schemes, such as “Four Hearts” and “Two Hearts in a Forest”.
- Ask students to reflect on how different color schemes change the artwork.
- Next, have students select a color scheme for a positive perspective and a color scheme for a negative perspective.
- Pass out 12x18 paper, scissors, circle templates, and tempera paint or watercolors.
- Have students trace four different sized circles on their paper and cut them out.
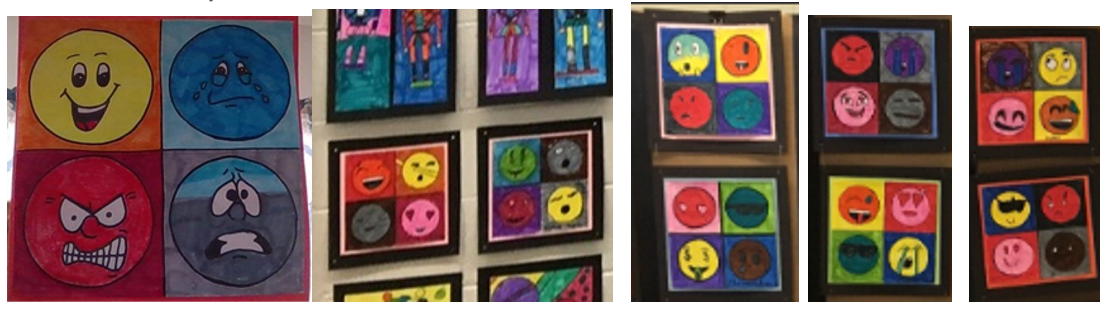
- Using the color schemes students selected, have students paint one side of each circle with one color scheme and the other side with the other color scheme. Encourage expressive application of paint. Optional: Look at examples of abstract artwork, particularly examples of Abstract Expressionism, with students.
- After the paint is dry, have students draw a spiral in each circle starting in the center and going out to the edge. Using scissors, students will cut along the spiral lines.
- Pass out yarn to each table and two popsicle sticks to each student.
- Students should paint their popsicle sticks on both sides.
- When dry, have students use the yarn to attach the popsicle stick in an “X”.
- Next, have students cut four pieces of yarn–all different lengths. Students should tie each piece of yarn to each end of the popsicle sticks. Then, they should attach one end of each of their spirals to the hanging ends of the yarn.
Closing Reflection
- Display students’ mobiles by hanging them around the classroom. Have students observe each other’s work.
- Allow time for students to discuss their color choices and how they reflect positivity or negativity.
Assessments
Formative
Assess students’ learning by observing students’ responses to discussion questions and conferencing with students throughout the planning and artmaking process.
Summative
Differentiation
|
Accelerated:
Remedial:
|
Credits
U.S. Department of Education- STEM + the Art of Integrated Learning
Ideas contributed by: Katy Betts
*This integrated lesson provides differentiated ideas and activities for educators that are aligned to a sampling of standards. Standards referenced at the time of publishing may differ based on each state’s adoption of new standards.
Revised and copyright: August 2025 @ ArtsNOW


