Explore Geometry with Abstract Imagery 2-3

EXPLORE GEOMETRY WITH ABSTRACT IMAGERY

EXPLORE GEOMETRY WITH ABSTRACT IMAGERY

Learning Description

Delve into the abstract world of Wassily Kandinsky! Allow your imagination to soar as you discover mathematical connections within Kandinsky images. Students will be inspired by the work of Kandinsky to create their own abstract art that incorporates geometric concepts and the elements of art.


Learning Targets

GRADE BAND: 2-3
CONTENT FOCUS: VISUAL ARTS & MATH
LESSON DOWNLOADS:

Download PDF of this Lesson

"I Can" Statements

“I Can…”

  • I can create artwork inspired by Wassily Kandinsky that demonstrates my understanding of mathematical concepts.
  • I can describe my artwork in terms of mathematical concepts.
  • I can identify mathematical concepts in my classmates' artwork.
  • I can use color and space intentionally in my art.

Essential Questions

  • How can you utilize visual images to learn about mathematical concepts?


Georgia Standards

Curriculum Standards

Grade 2: 

2.GSR.7.1 Describe, compare and sort 2-D shapes including polygons, triangles, quadrilaterals, pentagons, hexagons, and 3-D shapes including rectangular prisms and cones, given a set of attributes.


Grade 3: 

3.GSR.6.1 Identify perpendicular line segments, parallel line segments, and right angles, identify these in polygons, and solve problems involving parallel line segments, perpendicular line segments, and right angles.

3.GSR.6.2 Classify, compare, and contrast polygons, with a focus on quadrilaterals, based on properties. Analyze specific 3- dimensional figures to identify and describe quadrilaterals as faces of these figures.


Arts Standards

Grade 2: 

VA2.CR.1 Engage in the creative process to generate and visualize ideas by using subject matter and symbols to communicate meaning.

VA2.CR.2 Create works of art based on selected themes.

VA2.CR.4 Understand and apply media, techniques, and processes of three-dimensional art.

VA2.CN.2 Integrate information from other disciplines to enhance the understanding and production of works of art.


Grade 3: 

VA3.CR.1 Engage in the creative process to generate and visualize ideas by using subject matter and symbols to communicate meaning.

VA3.CR.2 Create works of art based on selected themes.

VA3.CR.4 Understand and apply media, techniques, and processes of three-dimensional art.

VA3.CN.2 Integrate information from other disciplines to enhance the understanding and production of works of art.


South Carolina Standards

Curriculum Standards

Grade 2: 

2.G.1 Identify triangles, quadrilaterals, hexagons, and cubes. Recognize and draw shapes having specified attributes, such as a given number of angles or a given number of equal faces.


Grade 3: 

3.G.1 Understand that shapes in different categories (e.g., rhombus, rectangle, square, and other 4-sided shapes) may share attributes (e.g., 4-sided figures) and the shared attributes can define a larger category (e.g., quadrilateral). Recognize rhombuses, rectangles, and squares as examples of quadrilaterals, and draw examples of quadrilaterals that do not belong to any of these subcategories.

3.G.3 Use a right angle as a benchmark to identify and sketch acute and obtuse angles.


Arts Standards

Anchor Standard 1: I can use the elements and principles of art to create artwork.

Anchor Standard 2: I can use different materials, techniques, and processes to make art.

Anchor Standard 4: I can organize work for presentation and documentation to reflect specific content, ideas, skills, and or media

Anchor Standard 5: I can interpret and evaluate the meaning of an artwork.


Key Vocabulary

Content Vocabulary

  • Geometry - Branch of mathematics that deals with deduction of the properties, measurement, and relationships of points, lines, angles, and figures in space from their defining conditions by means of certain assumed properties of space.
  • Polygon - A closed plane figure with at least three straight sides and angles, and typically five or more.
  • Acute angle - An angle measuring less than 90 degrees
  • Right angle - A 90 degree angle
  • Obtuse angle - An angle measuring greater than 90 degrees
  • Isosceles triangle - A type of triangle that has at least two sides of equal length
  • Equilateral triangle - A type of triangle in which all three sides are of equal length
  • Scalene triangle - A type of triangle in which all three sides have different lengths
  • Right triangle -  A triangle that has a right angle
  • Parallel lines - Lines that will never touch
  • Perpendicular lines - Lines that intersect forming a 90 degree angle


Arts Vocabulary

  • Abstract - Process of art-making that has reference to the real world but is distorted or manipulated in some way.
  • Non-objective - Process of art-making that has no reference to the real world; strictly composed of design elements.
  • Contrast - Exhibiting unlikeness in comparison to something else.
  • Line – One of the seven elements of art; a mark made by a pointed tool such as a brush pen or stick; a moving point
  • Shape (Geometric and Organic) – One of the seven elements of art; a flat, enclosed area that has two dimensions, length and width
  • Negative space - Empty space; the background
  • Color scheme - A limited number of colors used in an artwork
  • Warm colors - Red, pink, orange and yellow
  • Cool colors - Blue, green, purple/violet
  • Primary colors - Blue, yellow, red
  • Secondary colors - Orange, green, purple/violet
  • Neutral colors - Brown, tan, black, gray


Materials


Instructional Design

Opening/Activating Strategy

  • Introduce this activity by having students look at an image of “Composition 8” or “Red, Blue and Yellow” by Russian artist, Wassily Kandinsky.
  • Have students engage in the 10 x 2 artful thinking routine.
    • Students will work collaboratively to identify 10 things that they recognize in the image. Then, repeat the process; the second time, however, ask students to focus specifically on the colors and shapes that they see.
  • Facilitate a class-wide discussion around students’ observations.


Work Session

Process 

  • Project Kandinsky’s “Composition 8” and “Red, Blue and Yellow”, side by side (use slide two of Wassily Kandinsky images). Direct students to work collaboratively to use math vocabulary and concepts to describe the angles, lines, and shapes found within these abstract and non-objective masterpieces.
    • Students should draw/write their responses on sticky notes.
    • Direct students to identify the polygons within these images and their defining attributes, including different types of quadrilaterals.
    • Students should also look for examples of types of angles, types of triangles, and line relationships (parallel and perpendicular).
  • Draw or project a large Venn diagram on the board. Students should place their sticky notes in the appropriate section of the Venn diagram.
  • Next, tell students that they will create their own abstract or non-objective artwork in the style of Kandinsky according to criteria set by the teacher. For example, criteria might include designs including a minimum of three different types of quadrilaterals, a triangle, a polygon more than four sides and angles, two right angles, parallel lines, etc.
  • Project “Composition 8” and “Red, Blue and Yellow” again.
    • Ask students to make observations about how the space is used in the artwork. Students should notice that there isn’t much negative space or “empty space”.
  • Next, discuss the colors that Kandinsky used.
  • Project an image of a color wheel and discuss different types of color schemes: Warm, cool, neutral, primary and secondary.
  • Tell students that they will be using color to “color code” their artwork. How they do this is up to them.
    • For example, all triangles could be cool colors, all quadrilaterals could be warm colors, and all polygons with more than four sides could be neutral colors.
  • Students will then draw their designs lightly on paper or tag board in pencil and then add color using marker, tempera paint, colored pencil, oil pastel, etc.

Upon completion of their artwork, ask students to describe their art using mathematical vocabulary.  


Closing Reflection

  • Display students’ artwork on walls or place on tables/desks. Give students a “scavenger hunt” to find mathematical concepts in each other’s artwork.
  • See if students can figure out how other students used color in their artwork.


Assessments

Formative

  • Teachers will assess students’ understanding of the content throughout the lesson by observing students’ participation in the activator, discussion of the mathematical concepts evident in Kandinsky’s artwork, discussion of Kandinsky’s use of color and space, and ability to apply mathematical concepts to creating a unique artwork.


Summative

  • Students can create an artwork inspired by Wassily Kandinsky that demonstrates their mastery of mathematical concepts.
  • Students can describe their artwork in terms of mathematical concepts.
  • Students can identify mathematical concepts in each other’s artwork.
  • Students can use color and space intentionally in their art.


DIFFERENTIATION 

Acceleration: 

  • Have students identify the area and perimeter of the polygons in their artwork (grade 3).
  • Have students use scrap materials found in the classroom to interpret their artwork in a 3D format by turning it into sculpture. Materials could include popsicle sticks, tape, cardboard, pipe cleaners, straws, etc.

Remediation: 

  • Provide students with specific concepts to look for in Kandinsky’s artwork using a word bank.
  • Reduce/limit criteria in artwork to focus on fewer concepts at a time.
  • Provide visuals with examples of concepts to support students.
  • Allow students to work with a partner to create artwork.


 ADDITIONAL RESOURCES

*This integrated lesson provides differentiated ideas and activities for educators that are aligned to a sampling of standards. Standards referenced at the time of publishing may differ based on each state’s adoption of new standards.

 Ideas contributed by: Darby Jones. Updated by Shannon Green and Katy Betts.

 Revised and copyright:  August 2024 @ ArtsNOW

Monumental Sculpture 2-3

MONUMENTAL SCULPTURE

MONUMENTAL SCULPTURE

Learning Description

Discover the endless possibilities of paper sculpture! Let your imagination soar as you dive into this collaborative art-making process, creating large-scale, non-objective sculptures. Students will participate in the design process and analyze their sculptures through the lens of geometric concepts.


Learning Targets

GRADE BAND: 2-3
CONTENT FOCUS: VISUAL ARTS & MATH
LESSON DOWNLOADS:

Download PDF of this Lesson

"I Can" Statements

“I Can…”

  • I can work collaboratively to create a geometric sculpture in the round that demonstrates geometric concepts.
  • I can use the design process to design, create, and refine a sculpture in the round.
  • I can describe my sculpture in mathematical terms.

Essential Questions

  • How can art-making become a team building process?
  • How are mathematical concepts used in art?


Georgia Standards

Curriculum Standards

Grade 2: 

2.MP: Display perseverance and patience in problem-solving. Demonstrate skills and strategies needed to succeed in mathematics, including critical thinking, reasoning, and effective collaboration and expression. Seek help and apply feedback. Set and monitor goals.

2.GSR.7.1 Describe, compare and sort 2-D shapes including polygons, triangles, quadrilaterals, pentagons, hexagons, and 3-D shapes including rectangular prisms and cones, given a set of attributes.


Grade 3: 

3.MP: Display perseverance and patience in problem-solving. Demonstrate skills and strategies needed to succeed in mathematics, including critical thinking, reasoning, and effective collaboration and expression. Seek help and apply feedback. Set and monitor goals.

3.GSR.6.1 Identify perpendicular line segments, parallel line segments, and right angles, identify these in polygons, and solve problems involving parallel line segments, perpendicular line segments, and right angles.

3.GSR.6.2 Classify, compare, and contrast polygons, with a focus on quadrilaterals, based on properties. Analyze specific 3- dimensional figures to identify and describe quadrilaterals as faces of these figures.

3.GSR.7.3 Discover and explain how area can be found by multiplying the dimensions of a rectangle.

3.GSR.8.1 Determine the perimeter of a polygon and explain that the perimeter represents the distance around a polygon. Solve problems involving perimeters of polygons.

Arts Standards

Grade 2: 

VA2.CR.1 Engage in the creative process to generate and visualize ideas by using subject matter and symbols to communicate meaning.

VA2.CR.2 Create works of art based on selected themes.

VA2.CR.4 Understand and apply media, techniques, and processes of three-dimensional art.

VA2.CN.2 Integrate information from other disciplines to enhance the understanding and production of works of art.


Grade 3: 

VA3.CR.1 Engage in the creative process to generate and visualize ideas by using subject matter and symbols to communicate meaning.

VA3.CR.2 Create works of art based on selected themes.

VA3.CR.4 Understand and apply media, techniques, and processes of three-dimensional art.

VA3.CN.2 Integrate information from other disciplines to enhance the understanding and production of works of art.


South Carolina Standards

Curriculum Standards

Grade 2: 

2.G.1 Identify triangles, quadrilaterals, hexagons, and cubes. Recognize and draw shapes having specified attributes, such as a given number of angles or a given number of equal faces.


Grade 3: 

3.G.1 Understand that shapes in different categories (e.g., rhombus, rectangle, square, and other 4-sided shapes) may share attributes (e.g., 4-sided figures) and the shared attributes can define a larger category (e.g., quadrilateral). Recognize rhombuses, rectangles, and squares as examples of quadrilaterals, and draw examples of quadrilaterals that do not belong to any of these subcategories.

3.G.3 Use a right angle as a benchmark to identify and sketch acute and obtuse angles.

Arts Standards

Anchor Standard 1: I can use the elements and principles of art to create artwork.

Anchor Standard 2: I can use different materials, techniques, and processes to make art.

Anchor Standard 5: I can interpret and evaluate the meaning of an artwork.

Anchor Standard 7: I can relate visual arts ideas to other arts disciplines, content areas, and careers.


Key Vocabulary

Content Vocabulary

  • Area - The measure of the amount of space inside the boundary of a two-dimensional shape
  • Perimeter - The total distance around the boundary of a two-dimensional shape
  • Acute angle - An angle measuring less than 90 degrees
  • Right angle - A 90 degree angle
  • Obtuse angle - An angle measuring greater than 90 degrees
  • Isosceles triangle - A type of triangle that has at least two sides of equal length
  • Equilateral triangle - A type of triangle in which all three sides are of equal length
  • Scalene triangle - A type of triangle in which all three sides have different lengths
  • Right triangle -  A triangle that has a right angle
  • Parallel lines - Lines that will never touch
  • Perpendicular lines - Lines that intersect forming a 90 degree angle
  • Design process - A systematic, iterative method used by engineers to solve problems
  • Balance - Possessing equilibrium or equal distribution of weight
  • Counter balance - A weight balancing another weight

Arts Vocabulary

  • Construction - A type of sculpture in which materials are physically joined together to make a whole
  • Sculpture in the round - A three-dimensional structure that is meant to be viewed from all sides
  • Line - The path of a moving point
  • Shape - A two-dimensional enclosed line; in art, shape can be geometric or organic/freeform


Materials

  • Newspaper or newsprint sheets 24” x 36” (computer paper or lined paper can be substituted)
  • Masking tape
  • Pencils and sketch paper
  • Yardstick or measuring tape to measure dimensions of finished sculpture


Instructional Design

Opening/Activating Strategy

Classroom Tips: Have ample space in the room so groups can move far enough apart during the creating process to enable maximum space for the construction process.


  • Show students an image of “Mutual Support” by George Hart. Do not tell students the name of the sculpture.
  • Ask students to work collaboratively to make at least ten objective observations about the sculpture (i.e. color, line, types of shapes, overall shape, etc.).
    • Have students share observations as a whole class.
  • Next, ask students to guess how Hart constructed the sculpture. Have students share ideas as a class. Students should justify their answers by referring to specific things that they can see in the sculpture.
  • Show students the title of the sculpture, “Mutual Support”. Ask students how the design of the sculpture demonstrates the name.
  • Tell students that this is an example of sculpture in the round.
    • Tell students that sculpture is always three-dimensional and that sculpture in the round means that the viewer can walk all the way around the sculpture to view it from all sides.


Work Session

  • Tell students that in this lesson, they will be creating sculptures in the round inspired by the work of George Hart.
  • Introduce the design process to students.
  • Next, divide students into groups of 2-4.
  • Begin by demonstrating how to create building sticks by rolling sheets of newsprint from corner to corner using a pencil as a guide. The sticks are fastened at the end with a small piece of masking tape.
    • Each team member should create 5 sticks.


  • Ask students to experiment with the types of geometric shapes they can create with the sticks. Tell students that in their actual sculptures, they can bend the sticks to make smaller shapes.
  • Next, have students make a basic drawn design for their sculpture.
    • Tell students that they will need to start with a triangular or square base.
    • Remind students that a sculpture is always three-dimensional, so their final sculpture should not be flat.
    • Tell students that their sculptures must meet the following guidelines:
      • Sculptures must be made up of geometric shapes.
      • Constructions must be three-dimensional.
      • All materials must be fully incorporated into the group constructions.
      • Constructions must be able to stand on their own and be transported easily.
  • Students will work intuitively attaching sticks with masking tape until their construction is completed.
  • Encourage students to be mindful of strong construction, balance, and counter balance.
  • Once sculptures are complete, students will identify geometric figures within constructions according to physical attributes, such as number of vertices and sides, identifying parallel and perpendicular lines, identifying types of angles, etc.
    • Third grade students can also perform mathematical computations, such as estimating and calculating the perimeter and area of geometric shapes as relevant to grade level standards.


Closing Reflection

  • Students will reflect on the design process. Students should look at their original sketches and observe how their final product changed through the creation process.
    • Students should reflect on the following questions. This can be written or done orally through conversation.
      • How did the design change?
      • Why did the design change?
      • What design choices did you make to ensure that your sculpture could stand on its own?
      • If you were to design and create this artwork again, what would you do differently?
  • Students will present their sculptures to their peers, as a whole group or several small groups can present to each other, and discuss how their design changed from the original design to the final sculpture.


Assessments

Formative

Teachers will assess students’ understanding of the content throughout the lesson by observing students’ participation in the activator, collaboration during the design process and sculpture creation, and conferencing with students throughout the creative process.


Summative

CHECKLIST

  • Students can work collaboratively to create a geometric sculpture in the round that demonstrates geometric concepts.
  • Students can use the design process to design, create, and refine a sculpture in the round.
  • Students can describe their sculpture in mathematical terms.


DIFFERENTIATION 

Acceleration: Have students write step by step detailed instructions to tell another person how to recreate their sculpture using mathematical concepts. If time permits, two groups can swap instructions and attempt to build each other’s sculptures. Then, the groups should reflect on the results and evaluate the clarity of their written instructions.

Remediation: 

  • Show students an example of a completed sculpture so that students can visualize the end result. Analyze how the sculpture was created so that students can see the steps needed to create their sculpture.
  • Allow students to work on a smaller scale with smaller pieces of paper and/or with fewer paper sticks.
  • Provide an alternative to creating paper sticks, such as straws.


 ADDITIONAL RESOURCES


*This integrated lesson provides differentiated ideas and activities for educators that are aligned to a sampling of standards. Standards referenced at the time of publishing may differ based on each state’s adoption of new standards.

Ideas contributed by: Darby Jones. Updated by: Katy Betts.

Revised and copyright: August 2024 @ ArtsNOW


Counting with Cups 4-5

COUNTING WITH CUPS

COUNTING WITH CUPS

Learning Description

Help students recognize and cultivate creative and critical thinking using various activities that connect math and music! Consider valuable curriculum connections that assist in the development of problem solving skills through fun and engaging learning experiences.


Learning Targets

GRADE BAND: 4-5
CONTENT FOCUS: MUSIC & MATH
LESSON DOWNLOADS:

Download PDF of this Lesson

"I Can" Statements

“I Can…”

  • I can identify, speak, and move to a steady beat.
  • I can demonstrate understanding of mathematical concepts, such as fractions and multiplication, etc., through music.
  • I can compose and notate music.
  • I can explain how I used math to create my musical composition.
  • I can compare fractions with the same and different denominators.

Essential Questions

  • How can connecting math and music aid students in their problem solving abilities and cultivate creative and critical thinking?


Georgia Standards

Curriculum Standards

Grade 4: 

4.NR.4.2 Compare two fractions with the same numerator or the same denominator by reasoning about their size and recognize that comparisons are valid only when the two fractions refer to the same whole.

4.NR.4.3 Compare two fractions with different numerators and/or different denominators by flexibly using a variety of tools and strategies and recognize that comparisons are valid only when the two fractions refer to the same whole.


Grade 5: 

5.NR.3.1 Explain the meaning of a fraction as division of the numerator by the denominator ( / = a ÷ b). Solve problems involving division of whole numbers leading to answers in the form of fractions or mixed numbers.

5.NR.3.2 Compare and order up to three fractions with different numerators and/or different denominators by flexibly using a variety of tools and strategies.

Arts Standards

Grade 4:

ESGM4.CR.1 Improvise melodies, variations, and accompaniments.

ESGM4.CR.2 Compose and arrange music within specified guidelines.

ESGM4.PR.2 Perform a varied repertoire of music on instruments, alone and with others.

ESGM4.RE.1 Listen to, analyze, and describe music.

ESGM4.RE.2 Evaluate music and music performances.

ESGM4.CN.1 Connect music to the other fine arts and disciplines outside the arts.


Grade 5:

ESGM5.CR.1 Improvise melodies, variations, and accompaniments.

ESGM5.CR.2 Compose and arrange music within specified guidelines.

ESGM5.PR.2 Perform a varied repertoire of music on instruments, alone and with others.

ESGM5.RE.1 Listen to, analyze, and describe music.

ESGM5.RE.2 Evaluate music and music performances.

ESGM5.CN.1 Connect music to the other fine arts and disciplines outside the arts.


South Carolina Standards

Curriculum Standards

Grade 4: 

4.NSF.2 Compare two given fractions (i.e., denominators 2, 3, 4, 5, 6, 8, 10, 12, 25, 100) by creating common denominators or numerators, or by comparing to a benchmark fraction such as 1 / 2 and represent the comparison using the symbols >, =, or <.

4.ATO.1 Interpret a multiplication equation as a comparison (e.g. interpret 35 = 5x7 as a statement that 35 is 5 times as many as 7 and 7 times as many as 5.) Represent verbal statements of multiplicative comparisons as multiplication equations.

4.ATO.5 Generate a number or shape pattern that follows a given rule and determine a term that appears later in the sequence.


Grade 5: 

5.NSF.3 Understand the relationship between fractions and division of whole numbers by interpreting a fraction as the numerator divided by the denominator


Arts Standards

Anchor Standard 1: I can arrange and compose music.

Anchor Standard 2: I can improvise music.

Anchor Standard 4: I can play instruments alone and with others.

Anchor Standard 6: I can analyze music.

Anchor Standard 7: I can evaluate music.

Anchor Standard 9: I can relate music to other arts disciplines, other subjects, and career paths.


Key Vocabulary

Content Vocabulary

  • Division - Splitting a quantity into equal parts or groups
  • Multiplication - Combining equal groups to find the total number of items
  • Fractions - A mathematical expression that represents the division of one quantity by another

Arts Vocabulary

  • Body percussion - Sounds produced by striking or scraping parts of the body; typically includes snapping, clapping, patting, and stamping
  • Steady beat - An unchanging continuous pulse
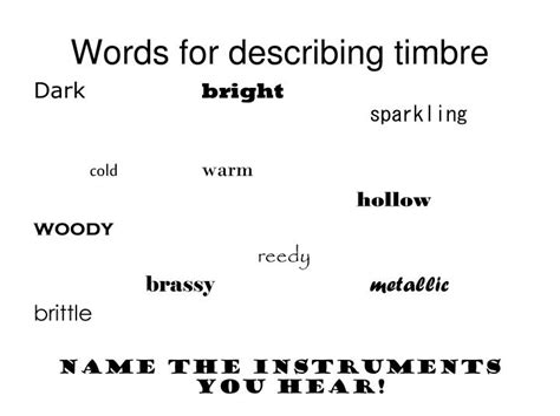
  • Timbre - The unique quality of a sound; also known as tone color or tone quality
  • Dynamics - Volume of sound (loudness, quietness)
  • Found sound - Sounds produced by non-traditional sound sources in the environment (e.g., scraping a ruler along a binder spine, tapping a pencil on a desk)
  • Phrase - A musical sentence
  • Retrograde - A musical line which is the reverse of a previously or simultaneously stated line
  • Rondo - A form of composition in which the first section recurs throughout the piece, alternating with different sections (e.g., A-B-A-B-A or A-B-A-C-A, etc.). This form is found especially in compositions of the Baroque and Classical eras.
  • Tempo - The speed of the beat


Materials

  • Variety of unpitched percussion instruments (can be “found sound”, such as, scraping a ruler along a binder spine, tapping a pencil on a desk)
  • Plastic cups in various colors and sizes
  • Rhythm sticks or dowel rods
  • Sound source (e.g., computer and speaker)
  • Musical recordings
  • Large pads and markers
  • Paper and writing utensils (pencils, markers, crayons, etc.)
  • Note cards with mathematical equations


Instructional Design

Opening/Activating Strategy

Classroom Tips - You may find it helpful to discuss proper use of, and care for, instruments prior to use. Discuss “resting” position, meaning no sound at all from instruments. Also discuss moving through “space” without touching anything else around. Pretend you are in a bubble and cannot touch anything or anyone in your surroundings.


  • Turn on music with a steady beat that is easy for students to follow (or, simply play a steady beat without accompanying music).
  • Students stand in the space (no formation).
  • Leader claps (or plays) the beat while students walk to the pulse.
  • Leader plays four beats (while students move); then students stop and clap four beats (same tempo as leader).
  • Continue the game, moving around the room freely.
  • Have students stop in front of someone and clap their partner’s hands for the second set of four claps.
  • Thus, the sequence becomes:
    • Move to leader’s beat (set 1 = 4 beats)
    • Stop and clap beat alone (set 2 = 4 beats)
    • Move to the leader's beat (set 3 = 4 beats)
      • Stop and clap your partner's hands (set 4 = 4 beats).
  • Have students move to a new partner each time.
  • Extend the sequence by adding additional movements and/or body percussion for subsequent sets of four beats (e.g., move to leader’s beat; clap beat alone; move to leader’s beat; clap partner’s hands; move to leader’s beat; pat beat; etc.).


Work Session

Wake-up and Warm-up  

  • Tell students that they will continue the activator, but now, they will turn it into a mathematical equation!
    • Example: 4+4+4+4=16 or 4x4=16
  • Experiment with different tempos and different numbers of beats (i.e., slower tempo, use body percussion or instruments to show 3+3+3+3+=12 or 3x4=12).
  • Introduce a variety of rhythm instruments if available (rhythm sticks, drum, wood block, triangle, tambourine). Otherwise, use objects around the classroom, such as scraping a ruler along a binder spine, tapping a pencil on a desk.
  • Take time to discuss the various shapes of each instrument (compare and contrast both shapes and sounds—timbre).
  • Use students to demonstrate to group various equations that can be solved.
  • Teacher will have two students play 6+6=12.
  • Arrange students in pairs and pass out equations. Then have students “play” equations and have partners solve the equations.
    • For example if a notecard shows 4+4=8, one student would play 4 beats with one instrument or body percussion (such as clapping) and the other student would have to solve by saying “you demonstrated 4+4=8”. Next, have students express the equation in terms of fractions. For example, ½ of the composition was clapping and ½ was stomping.
    • Then switch roles.
    • Then challenge the students to just play the answer (for example, 8). The other student must find a way to “play” 8, such as 2+2+2+2. Then, have students express the composition in terms of fractions.


Question and Answer

  • The format of this strategy will have the question being asked on the first eight beats and the answer on the second eight beats); reverse.  Display visuals of numbers.
    1 2 3 4 5 6 7 8
    1 2 3 4 5 6 7 -
    • Have students speak numbers in a given tempo.
    • Have students clap once on each number while speaking; repeat, eliminating speech.
  • Divide the class into two groups.
  • Have students clap twice on one number of their choice; extend to clapping twice on two numbers.
    • Discuss how if we clap twice on one beat (or one number) it represents two half beats. Show the fraction 1/2.
  • Under each of the numbers, draw “stick notation” to show quarter notes and eighth notes. Quarter note =1 and the eighth note =½.
  • Now, incorporate questions and answers. Leader provides a question via clapping the first eight beats; students use part of the question in their answer in the second eight beats (e.g., “use the first part of my question as the first part of your answer”).
    • Extend to other body percussion, found sound, and/or unpitched percussion.
  • Try the strategy using pairs instead of two groups. Divide students into pairs, with one person providing the question and another, the answer; reverse.
  • Incorporate movement; add to a recording if desired (for example, “Hora Agadati” or “Jai Ho”).
    • Have students walk eight beats and then “answer” using body percussion for the next eight beats.
  • Tell students that a phrase in music is a musical sentence. Ask mathematical questions such as, if each phase is eight beats and we have four phases, how many total beats? If the first eight beats are made by clapping, what fraction of the composition is clapping?
  • Have students work in pairs to create a “composition” using rhythm instruments that contains between two and six phrases (each phrase must be between six and twelve beats).
  • Have them label the phrases with capital letters and then show equations for “how they play” each phrase (as demonstrated in the previous activity).
  • Have students compare compositions in terms of fractions. The total number of beats in the composition will be the denominator.


Composing with Cups

  • Display different colored cups and have students reach consensus about desired sound for each (e.g., blue – quarter note, yellow – eighth notes, clear – quarter rest).
  • Introduce silently, having students use creative and critical thinking to figure out the values (number of sounds for each cup) independently first.
  • Teacher should lead this activity in silence, changing cups (number of sounds) and even length of phrase prior to any discussion.
  • Pause and discuss what students observed about the values of each cup.
  • Next, have individual students create rhythmic patterns for others to perform using the different colored cups.
  • Have students “conduct” their patterns by leading other students in performing them.
  • Variations:
    • Experiment with performing multiple patterns at the same time (having two groups perform simultaneously), reading in retrograde (reverse order), adding dynamics (loud/soft), etc.
    • Add to a recording as desired (such as Sousa’s “Stars and Stripes Together”).
    • Have two groups face each other. Have a student compose a pattern behind another group and the group facing him/her perform the rhythm.
      • The group with their back to the composer will write the rhythm using traditional or “stick” notation.
  • Finally, have students work in small groups to create their own composition with cups. Students should notate their composition and be able to explain the mathematical concepts embedded in their composition, such as fractions.


Closing Reflection

  • Students will perform their compositions for the group. Discuss appropriate audience participation prior to performances.
  • Ask the audience to help identify mathematical connections.
  • Have students compare different compositions in terms of fractions. For example, students can compare the fraction of claps in one composition to the fraction of claps in another composition even if the total number of beats in the composition is different (different denominators).


Assessments

Formative

Teachers will assess students’ understanding of the content throughout the lesson by observing students’ participation in the activator, ability to “play mathematical equations”, ability to move and speak to a steady beat, and collaboration with groups to compose a musical piece.


Summative

CHECKLIST

  • Students can identify, speak, and move to a steady beat.
  • Students can demonstrate understanding of mathematical concepts, such as patterns and addition, through music.
  • Students can compose music.
  • Students can explain how they used math to create their musical compositions.


DIFFERENTIATION 

Acceleration: 

  • Challenge students to add dynamics to and/or change the tempo of their performances and discuss how these changes alter the music.

Remediation: 

  • Scaffold the lesson by composing together as a class and discussing how pattern and addition were used.
  • Reduce the length of the composition students create at the end of the lesson to one phrase of four beats.

*This integrated lesson provides differentiated ideas and activities for educators that are aligned to a sampling of standards. Standards referenced at the time of publishing may differ based on each state’s adoption of new standards.

Ideas contributed by: Pamela Walker and Maribeth Yoder-White.

Revised and copyright: September 2024 @ ArtsNOW


Explore Geometry with Abstract Imagery 4-5

EXPLORE GEOMETRY WITH ABSTRACT IMAGERY

EXPLORE GEOMETRY WITH ABSTRACT IMAGERY

Learning Description

Delve into the abstract world of Wassily Kandinsky! Allow your imagination to soar as you discover mathematical connections within Kandinsky images. Students will be inspired by the work of Kandinsky to create their own abstract art that incorporates geometric concepts and the elements of art.


Learning Targets

GRADE BAND: 4-5
CONTENT FOCUS: VISUAL ARTS & MATH
LESSON DOWNLOADS:

Download PDF of this Lesson

"I Can" Statements

“I Can…”

  • I can create artwork inspired by Wassily Kandinsky that demonstrates my understanding of mathematical concepts.
  • I can describe my artwork in terms of mathematical concepts.
  • I can identify mathematical concepts in my classmates' artwork.
  • I can use color and space intentionally in my art.

Essential Questions

  • How can you utilize visual images to learn about mathematical concepts?


Georgia Standards

Curriculum Standards

Grade 4: 

4.GSR.8.1 Explore, investigate, and draw points, lines, line segments, rays, angles (right, acute, obtuse), perpendicular lines, parallel lines, and lines of symmetry. Identify these in two-dimensional figures.

4.GSR.8.2 Classify, compare, and contrast polygons based on lines of symmetry, the presence or absence of parallel or perpendicular line segments, or the presence or absence of angles of a specified size and based on side lengths.


Grade 5: 

5.GSR.8.1 Classify, compare, and contrast polygons based on properties.

Arts Standards

Grade 4: 

VA4.CR.1 Engage in the creative process to generate and visualize ideas by using subject matter and symbols to communicate meaning

VA4.CR.2 Create works of art based on selected themes.

VA4.CR.3 Understand and apply media, techniques, and processes of two-dimensional art.

VA4.RE.1 Discuss personal works of art and the artwork of others to enhance visual literacy.

VA4.CN.2 Integrate information from other disciplines to enhance the understanding and production of works of art.

VA4.CN.3 Develop life skills through the study and production of art (e.g. collaboration, creativity, critical thinking, communication).


Grade 5: 

VA5.CR.1 Engage in the creative process to generate and visualize ideas by using subject matter and symbols to communicate meaning

VA5.CR.2 Create works of art based on selected themes.

VA5.CR.3 Understand and apply media, techniques, and processes of two-dimensional art.

VA5.RE.1 Discuss personal works of art and the artwork of others to enhance visual literacy.

VA5.CN.2 Integrate information from other disciplines to enhance the understanding and production of works of art.

VA5.CN.3 Develop life skills through the study and production of art (e.g. collaboration, creativity, critical thinking, communication).


South Carolina Standards

Curriculum Standards

Grade 4: 

4.G.1 Draw points, lines, line segments, rays, angles (i.e., right, acute, obtuse), and parallel and perpendicular lines. Identify these in two-dimensional figures.

4.G.2 Classify quadrilaterals based on the presence or absence of parallel or perpendicular lines. 4.G.3 Recognize right triangles as a category, and identify right triangles.


Grade 5: 

5.G.3 Understand that attributes belonging to a category of two-dimensional figures also belong to all subcategories of that category.

5.G.4 Classify two-dimensional figures in a hierarchy based on their attributes.


Arts Standards

Anchor Standard 1: I can use the elements and principles of art to create artwork.

Anchor Standard 2: I can use different materials, techniques, and processes to make art.

Anchor Standard 4: I can organize work for presentation and documentation to reflect specific content, ideas, skills, and or media

Anchor Standard 5: I can interpret and evaluate the meaning of an artwork.


Key Vocabulary

Content Vocabulary

  • Geometry - Branch of mathematics that deals with deduction of the properties, measurement, and relationships of points, lines, angles, and figures in space from their defining conditions by means of certain assumed properties of space.
  • Polygon - A closed plane figure with at least three straight sides and angles, and typically five or more.
  • Acute angle - An angle measuring less than 90 degrees
  • Right angle - A 90 degree angle
  • Obtuse angle - An angle measuring greater than 90 degrees
  • Isosceles triangle - A type of triangle that has at least two sides of equal length
  • Equilateral triangle - A type of triangle in which all three sides are of equal length
  • Scalene triangle - A type of triangle in which all three sides have different lengths
  • Right triangle -  A triangle that has a right angle
  • Parallel lines - Lines that will never touch
  • Perpendicular lines - Lines that intersect forming a 90 degree angle


Arts Vocabulary

  • Abstract - Process of art-making that has reference to the real world but is distorted or manipulated in some way.
  • Non-objective - Process of art-making that has no reference to the real world; strictly composed of design elements.
  • Contrast - Exhibiting unlikeness in comparison to something else.
  • Line – One of the seven elements of art; a mark made by a pointed tool such as a brush pen or stick; a moving point
  • Shape (Geometric and Organic) – One of the seven elements of art; a flat, enclosed area that has two dimensions, length and width
  • Negative space - Empty space; the background
  • Color scheme - A limited number of colors used in an artwork
  • Warm colors - Red, pink, orange and yellow
  • Cool colors - Blue, green, purple/violet
  • Primary colors - Blue, yellow, red
  • Secondary colors - Orange, green, purple/violet
  • Neutral colors - Brown, tan, black, gray


Materials


Instructional Design

Opening/Activating Strategy

  • Introduce this activity by having students look at images of “Composition 8” and “Red, Blue and Yellow” by Russian artist, Wassily Kandinsky.
  • Have students engage in the 10 x 2 artful thinking routine.
    • Students will work collaboratively to identify 10 things that they recognize in the image. Then, repeat the process; the second time, however, ask students to focus specifically on the colors and shapes that they see.
  • Facilitate a class-wide discussion around students’ observations.


Work Session

Process 

  • Looking at Kandinsky’s “Composition 8” and “Red, Blue and Yellow”, direct students to work collaboratively to use math vocabulary and concepts to describe the angles, lines, and shapes found within these abstract and non-objective masterpieces.
    • Students should draw/write their responses on sticky notes.
    • Direct students to identify the polygons within these images and their defining attributes.
    • Students should also look for examples of types of angles, types of triangles, and line relationships (parallel and perpendicular).
  • Students will then create Venn diagrams that compare and contrast the two different Kandinsky prints. Students can place their sticky notes in the appropriate section of the Venn diagram.
  • Next, tell students that they will create their own abstract or non-objective artwork in the style of Kandinsky according to criteria set by the teacher. For example, criteria might include designs including a minimum of five intersecting lines, one of each type of triangle, two right angles, one acute angle, one obtuse angle, two different types of quadrilaterals with parallel lines, etc.
  • Project “Composition 8” and “Red, Blue and Yellow” again.
    • Ask students to make observations about how the space is used in the artwork. Students should notice that there isn’t much negative space or “empty space”.
  • Next, discuss the colors that Kandinsky used.
  • Project an image of a color wheel and discuss different types of color schemes: Warm, cool, neutral, primary and secondary.
  • Tell students that they will be using color to “color code” their artwork. How they do this is up to them.
    • For example, all polygons might be warm colors and all lines might be cool colors.
      • Students can then further categorize by making all triangles red and all quadrilaterals orange. Or, each type of triangle or each type of quadrilateral could be a different warm color.
      • All lines that intersect at right angles might be blue and all lines that intersect at obtuse and acute angle might be green. All lines that don’t intersect might be purple/violet.
      • These are just a sampling of ideas–encourage students to choose how they want to use color in their art.
  • Students will then draw their designs lightly on paper or tag board in pencil and then add color using marker, tempera paint, colored pencil, oil pastel, etc.

Upon completion of their artwork, ask students to describe their art using mathematical vocabulary.  


Closing Reflection

  • Display students’ artwork on walls or place on tables/desks. Give students a “scavenger hunt” to find mathematical concepts in each other’s artwork.
  • See if students can figure out how other students used color in their artwork.


Assessments

Formative

  • Teachers will assess students’ understanding of the content throughout the lesson by observing students’ participation in the activator, discussion of the mathematical concepts evident in Kandinsky’s artwork, discussion of Kandinsky’s use of color and space, and ability to apply mathematical concepts to creating a unique artwork.


Summative

  • Students can create an artwork inspired by Wassily Kandinsky that demonstrates their mastery of mathematical concepts.
  • Students can describe their artwork in terms of mathematical concepts.
  • Students can identify mathematical concepts in each other’s artwork.
  • Students can use color and space intentionally in their art.


DIFFERENTIATION 

Acceleration: 

  • Have students identify the area and perimeter of the polygons in their artwork.
  • Have students use scrap materials found in the classroom to interpret their artwork in a 3D format by turning it into sculpture. Materials could include popsicle sticks, tape, cardboard, pipe cleaners, straws, etc.

Remediation: 

  • Provide students with specific concepts to look for in Kandinsky’s artwork using a word bank.
  • Reduce/limit criteria in artwork to focus on fewer concepts at a time.
  • Provide visuals with examples of concepts to support students.
  • Allow students to work with a partner to create artwork.


 ADDITIONAL RESOURCES

*This integrated lesson provides differentiated ideas and activities for educators that are aligned to a sampling of standards. Standards referenced at the time of publishing may differ based on each state’s adoption of new standards.

 Ideas contributed by: Darby Jones. Updated by Shannon Green and Katy Betts.

 Revised and copyright:  August 2024 @ ArtsNOW

Monumental Sculpture 4-5

MONUMENTAL SCULPTURE

MONUMENTAL SCULPTURE

Learning Description

Discover the endless possibilities of paper sculpture! Let your imagination soar as you dive into this collaborative art-making process, creating large-scale, non-objective sculptures. Students will participate in the design process and analyze their sculptures through the lens of geometric concepts.


Learning Targets

GRADE BAND: 4-5
CONTENT FOCUS: VISUAL ARTS & MATH
LESSON DOWNLOADS:

Download PDF of this Lesson

"I Can" Statements

“I Can…”

  • I can work collaboratively to create a geometric sculpture in the round that demonstrates geometric concepts.
  • I can use the design process to design, create, and refine a sculpture in the round.
  • I can describe my sculpture in mathematical terms.

Essential Questions

  • How can art-making become a team building process?
  • How are mathematical concepts used in art?


Georgia Standards

Curriculum Standards

Grade 4: 

4.MP: Display perseverance and patience in problem-solving. Demonstrate skills and strategies needed to succeed in mathematics, including critical thinking, reasoning, and effective collaboration and expression. Seek help and apply feedback. Set and monitor goals.

4.GSR.8.1 Explore, investigate, and draw points, lines, line segments, rays, angles (right, acute, obtuse), perpendicular lines, parallel lines, and lines of symmetry. Identify these in two-dimensional figures.

4.GSR.8.2 Classify, compare, and contrast polygons based on lines of symmetry, the presence or absence of parallel or perpendicular line segments, or the presence or absence of angles of a specified size and based on side lengths.

4.GSR.8.3 Solve problems involving area and perimeter of composite rectangles involving whole numbers with known side lengths.


Grade 5: 

5.MP: Display perseverance and patience in problem-solving. Demonstrate skills and strategies needed to succeed in mathematics, including critical thinking, reasoning, and effective collaboration and expression. Seek help and apply feedback. Set and monitor goals.

5.GSR.8.1 Classify, compare, and contrast polygons based on properties.


Arts Standards

Grade 4: 

VA4.CR.1 Engage in the creative process to generate and visualize ideas by using subject matter and symbols to communicate meaning.

VA4.CR.2 Create works of art based on selected themes.

VA4.CR.4 Understand and apply media, techniques, and processes of three-dimensional art.

VA4.CN.2 Integrate information from other disciplines to enhance the understanding and production of works of art.


Grade 5: 

VA5.CR.1 Engage in the creative process to generate and visualize ideas by using subject matter and symbols to communicate meaning.

VA5.CR.2 Create works of art based on selected themes.

VA5.CR.4 Understand and apply media, techniques, and processes of three-dimensional art.

VA5.CN.2 Integrate information from other disciplines to enhance the understanding and production of works of art.


South Carolina Standards

Curriculum Standards

Grade 4: 

4.G.1 Draw points, lines, line segments, rays, angles (i.e., right, acute, obtuse), and parallel and perpendicular lines. Identify these in two-dimensional figures.

4.G.2 Classify quadrilaterals based on the presence or absence of parallel or perpendicular lines. 4.G.3 Recognize right triangles as a category, and identify right triangles.


Grade 5: 

5.G.3 Understand that attributes belonging to a category of two-dimensional figures also belong to all subcategories of that category.

5.G.4 Classify two-dimensional figures in a hierarchy based on their attributes.


Arts Standards

Anchor Standard 2: I can use different materials, techniques, and processes to make art.

Anchor Standard 5: I can interpret and evaluate the meaning of an artwork.

Anchor Standard 7: I can relate visual arts ideas to other arts disciplines, content areas, and careers.


Key Vocabulary

Content Vocabulary

  • Area - The measure of the amount of space inside the boundary of a two-dimensional shape
  • Perimeter - The total distance around the boundary of a two-dimensional shape
  • Acute angle - An angle measuring less than 90 degrees
  • Right angle - A 90 degree angle
  • Obtuse angle - An angle measuring greater than 90 degrees
  • Isosceles triangle - A type of triangle that has at least two sides of equal length
  • Equilateral triangle - A type of triangle in which all three sides are of equal length
  • Scalene triangle - A type of triangle in which all three sides have different lengths
  • Right triangle -  A triangle that has a right angle
  • Parallel lines - Lines that will never touch
  • Perpendicular lines - Lines that intersect forming a 90 degree angle
  • Design process - A systematic, iterative method used by engineers to solve problems
  • Balance - Possessing equilibrium or equal distribution of weight
  • Counter balance - A weight balancing another weight

Arts Vocabulary

  • Construction - A type of sculpture in which materials are physically joined together to make a whole
  • Sculpture in the round - A three-dimensional structure that is meant to be viewed from all sides
  • Line - The path of a moving point
  • Shape - A two-dimensional enclosed line; in art, shape can be geometric or organic/freeform


Materials

  • Newspaper or newsprint sheets 24” x 36” (computer paper or lined paper can be substituted)
  • Masking tape
  • Pencils and sketch paper
  • Yardstick or measuring tape to measure dimensions of finished sculpture


Instructional Design

Opening/Activating Strategy

Classroom Tips: Have ample space in the room so groups can move far enough apart during the creating process to enable maximum space for the construction process.


  • Show students an image of “Mutual Support” by George Hart. Do not tell students the name of the sculpture.
  • Ask students to work collaboratively to make at least ten objective observations about the sculpture (i.e. color, line, angles, overall shape, etc.).
    • Have students share observations as a whole class.
  • Next, ask students to guess how Hart constructed the sculpture. Have students share ideas as a class. Students should justify their answers by referring to specific things that they can see in the sculpture.
  • Show students the title of the sculpture, “Mutual Support”. Ask students how the design of the sculpture demonstrates the name.
  • Tell students that this is an example of sculpture in the round.
    • Tell students that sculpture is always three-dimensional and that sculpture in the round means that the viewer can walk all the way around the sculpture to view it from all sides.


Work Session

  • Tell students that in this lesson, they will be creating sculptures in the round inspired by the work of George Hart.
  • Introduce the design process to students.
  • Next, divide students into groups of 2-4.
  • Begin by demonstrating how to create building sticks by rolling sheets of newsprint from corner to corner using a pencil as a guide. The sticks are fastened at the end with a small piece of masking tape.
    • Each team will need 20 sticks total.


  • Ask students to experiment with the types of geometric shapes they can create with the sticks. Tell students that in their actual sculptures, they can bend the sticks to make smaller shapes.
  • Next, have students make a basic drawn design for their sculpture.
    • Tell students that they will need to start with a triangular or square base.
    • Remind students that a sculpture is always three-dimensional, so their final sculpture should not be flat.
    • Tell students that their sculptures must meet the following guidelines:
      • Sculptures must be made up of geometric shapes.
      • Constructions must be three-dimensional.
      • All materials must be fully incorporated into the group constructions.
      • Constructions must be able to stand on their own and be transported easily.
  • Students will work intuitively attaching sticks with masking tape until their construction is completed.
  • Encourage students to be mindful of strong construction, balance, and counter balance.
  • Once sculptures are complete, students will identify geometric figures within constructions according to physical attributes and perform mathematical computations such as estimating and calculating the perimeter, and area of geometric shapes and identifying types of angles and triangles.


Closing Reflection

  • Students will reflect on the design process. Students should look at their original sketches and observe how their final product changed through the creation process.
    • Students should reflect on the following questions. This can be written or done orally through conversation.
      • How did the design change?
      • Why did the design change?
      • What design choices did you make to ensure that your sculpture could stand on its own?
      • If you were to design and create this artwork again, what would you do differently?
  • Students will present their sculptures to their peers, as a whole group or several small groups can present to each other, and discuss how their design changed from the original design to the final sculpture.


Assessments

Formative

Teachers will assess students’ understanding of the content throughout the lesson by observing students’ participation in the activator, collaboration during the design process and sculpture creation, and conferencing with students throughout the creative process.


Summative

CHECKLIST

  • Students can work collaboratively to create a geometric sculpture in the round that demonstrates geometric concepts.
  • Students can use the design process to design, create, and refine a sculpture in the round.
  • Students can describe their sculpture in mathematical terms.


DIFFERENTIATION 

Acceleration: Have students write step by step detailed instructions to tell another person how to recreate their sculpture using mathematical concepts. If time permits, two groups can swap instructions and attempt to build each other’s sculptures. Then, the groups should reflect on the results and evaluate the clarity of their written instructions.

Remediation: 

  • Show students an example of a completed sculpture so that students can visualize the end result. Analyze how the sculpture was created so that students can see the steps needed to create their sculpture.
  • Provide an alternative to creating paper sticks, such as straws.


 ADDITIONAL RESOURCES


*This integrated lesson provides differentiated ideas and activities for educators that are aligned to a sampling of standards. Standards referenced at the time of publishing may differ based on each state’s adoption of new standards.

Ideas contributed by: Darby Jones. Updated by: Katy Betts.

Revised and copyright: August 2024 @ ArtsNOW