UNDERSTANDING INFORMATIONAL TEXT THROUGH LANDSCAPE ART 6-8

UNDERSTANDING INFORMATIONAL TEXT
THROUGH LANDSCAPE ART

MOSAICS AND MATH

Learning Description

In this lesson, students will demonstrate their understanding of informational texts by using text evidence to create a landscape artwork.


Learning Targets

GRADE BAND: 6-8
CONTENT FOCUS: VISUAL ARTS, ELA, SOCIAL STUDIES
LESSON DOWNLOADS:

Download PDF of this Lesson

"I Can" Statements

“I Can…”

  • I can visualize supporting details in an informational text to create a landscape artwork.

  • I can annotate an informational text to identify the most important details.

  • I can synthesize the information presented in two different texts.

Essential Questions

  • How can I visualize supporting details in an informational text to create a landscape artwork?

  • How can I identify the most important details using annotation?

  • How can I synthesize the information presented in two different texts?


Georgia Standards

Curriculum Standards

Grade 6

ELA

ELAGSE6RI1 Cite textual evidence to support analysis of what the text says explicitly as well as inferences drawn from the text. 

ELAGSE6RI2 Determine a central idea of a text and how it is conveyed through particular details; provide a summary of the text distinct from personal opinions or judgments.


SOCIAL STUDIES

SS6G1 Locate selected features of Latin America.

SS6G4 Locate selected features of Canada.

SS6G7 Locate selected features of Europe.

SS6G11 Locate selected features of Australia.


Grade 7

ELA

ELAGSE7RI1 Cite several pieces of textual evidence to support analysis of what the text says explicitly as well as inferences drawn from the text.

ELAGSE7W8 Gather relevant information from multiple print and digital sources, using search terms effectively; assess the credibility and accuracy of each source; and quote or paraphrase the data and conclusions of others while avoiding plagiarism and following a standard format for citation. 


SOCIAL STUDIES

SS7G1 Locate selected features of Africa.

SS7G5 Locate selected features in Southwest Asia (Middle East).

SS7G9 Locate selected features in Southern and Eastern Asia.


Grade 8

ELAGSE8RI1 Cite the textual evidence that most strongly supports an analysis of what the text says explicitly as well as inferences drawn from the text.

ELAGSE8RI2 Determine a central idea of a text and analyze its development over the course of the text, including its relationship to supporting ideas; provide an objective summary of the text.


SOCIAL STUDIES

SS8G1 Describe Georgia’s geography and climate.

Arts Standards

Grade 6

VA6.CR.1 Visualize and generate ideas for creating works of art. 

VA6.CR.2 Choose from a range of materials and/or methods of traditional and contemporary artistic practices to plan and create works of art.

VA6.CR.3 Engage in an array of processes, media, techniques, and/or technology through experimentation, practice, and persistence.


Grade 7

VA7.CR.1 Visualize and generate ideas for creating works of art. 

VA7.CR.2 Choose from a range of materials and/or methods of traditional and contemporary artistic practices to plan and create works of art.

VA7.CR.3 Engage in an array of processes, media, techniques, and/or technology through experimentation, practice, and persistence. 


Grade 8

VA8.CR.1 Visualize and generate ideas for creating works of art. 

VA8.CR.2 Choose from a range of materials and/or methods of traditional and contemporary artistic practices to plan and create works of art.

VA8.CR.3 Engage in an array of processes, media, techniques, and/or technology through experimentation, practice, and persistence.


South Carolina Standards

Curriculum Standards

Grade 6

ELA

Reading - Informational Text (RI) - Meaning and Context 

Standard 6: Summarize key details and ideas to support analysis of central ideas.

6.1 Provide an objective summary of a text with two or more central ideas; cite key supporting details.


Grade 7

ELA

Reading - Informational Text (RI) - Meaning and Context 

Standard 6: Summarize key details and ideas to support analysis of central ideas.

6.1 Provide an objective summary of a text with two or more central ideas; cite key supporting details to analyze their development. 


SOCIAL STUDIES

7.1.1.PR Identify select African physical systems and human characteristics of places.

7.2.1.PR Identify select Asian physical systems and human characteristics of places.

7.3.1.PR Identify select Australia, Oceania, and Antarctica physical systems and human characteristics of places.

7.4.1.PR Identify select European physical systems and human characteristics of places.

7.5.1.PR Identify select North American physical systems and human characteristics of places.

7.6.1.PR Identify select South American physical systems (e.g., landforms and bodies of water), and human characteristics of places (e.g., countries and cities).


Grade 8

ELA

Reading - Informational Text (RI) - Meaning and Context 

Standard 6: Summarize key details and ideas to support analysis of central ideas.

6.1 Provide an objective summary of a text with two or more central ideas; cite key supporting details to analyze their development.


Arts Standards

Anchor Standard 1: I can use the elements and principles of art to create artwork.

Anchor Standard 2: I can use different materials, techniques, and processes to make art.

Anchor Standard 5: I can interpret (read) and evaluate the meaning of an artwork.

Anchor Standard 7: I can relate visual arts ideas to other arts disciplines, content areas, and careers.


Key Vocabulary

Content Vocabulary

  • Informational text - Nonfiction writing that has the purpose of informing the reader
  • Synthesize - To combine two or more sources of information into one coherent source of information
  • Annotate - To take notes on a text
  • Physical feature - A landform such as a mountain, river, desert, etc.
  • Text evidence - Information that comes directly from the text that supports the main idea of the text

Arts Vocabulary

  • Space - One of the seven Elements of Art; techniques artists use to create the illusion of depth on a 2D surface
  • Landscape - A type of art that shows a wide expanse of land–usually a countryside–and shows depth through a background, middle ground, and foreground
  • Foreground - The part of a landscape that is closest to the viewer
  • Background - The part of a landscape that is farthest from the viewer
  • Middle ground - The part of a landscape that is in between the background and the foreground
  • Texture - One of the seven elements of art; how something feels or looks like it feels
  • Printmaking - Printmaking is a process by which the artist creates an image that has texture and transfers that image repeatedly onto another surface like paper.
  • Collagraph printmaking - A form of printmaking in which texture is built up on a surface by layering materials. The artist then transfers the image through a process like a rubbing onto another surface like paper.


Materials

    • Computer paper
    • Cardstock
    • Cardboard or additional cardstock for background
    • Scissors
    • Glue sticks
    • Pencils
    • Crayons or oil pastels (teacher tip: soak oil pastels or crayons in warm soapy water overnight; paper labels will easily come off the next day)
    • Informational text that describes a geographic location students are studying in Social Studies such as the Sahara Desert (7th grade SS, GA)
    • Optional - colored pencils


    Instructional Design

    Opening/Activating Strategy

    • Project a landscape painting such as Landscape from Saint Remy by Vincent Van Gogh
      • First, students will identify what they see in the image. Emphasize that they should make objective observations about the painting (i.e. physical features, colors, textures, etc.). 
      • Next, ask students to identify what they think about the image. Emphasize that students should be creating inferences using visual evidence from the painting. 
      • Finally, ask students what they wonder about the image. 
      • Ask students to work collaboratively to engage in the See, Think, Wonder protocol (Harvard University Project Zero - Artful Thinking Strategies). 
      • Facilitate a class-wide discussion around students’ observations, inferences, and questions.


    Work Session

      • Explain that the artwork students are looking at is an example of a landscape painting. Landscape paintings show a wide expanse of land–usually a countryside–and show depth through a background, middle ground, and foreground. 
      • Show students the diagram of a landscape. Explain that the background is what is farthest away from the viewer, the foreground is directly in front of the viewer, and the middle ground everything in the middle. 
      • Ask students to try to identify the background, middle ground, and foreground in Landscape from Saint Remy by Vincent Van Gogh.
      • Explain to students that texture in art is how something feels or looks like it feels. Ask students to identify textures in the landscape painting.
      • Tell students that they will be creating their own landscape artwork based off of an informational text. Provide each student with a copy of the informational text that connects to a region students are studying in Social Studies (if applicable). 
      • With partners, have students annotate the text as they read, looking for details that describe how the region looks such as landforms, colors, etc. 
      • Facilitate a discussion with students around what details they might include in the background, what details they might include in the middle ground, and what details they might include in the foreground. 
      • Instruct students to locate and research an additional informational text on the same region. 
        • Students should use their knowledge of research practices to identify a reliable source. Students should annotate the text as they did previously. 
        • Students will synthesize the details that they found in the two sources to create their landscape artwork. 
      • Introduce students to the term Collagraph Printmaking. 
        • Printmaking is a process by which the artist creates an image that has texture and transfers that image repeatedly onto another surface like paper. 
        • Tell students that the printing press is an early example of printmaking. 
      • Explain the process of creating their artwork. 
        • Students will draw a rough draft of their landscape on blank paper using evidence from both texts. Students’ rough drafts should have a background, middle ground, and foreground.
        • Out of cardstock, students will cut out landforms like mountains and physical features like forests that they included in their rough draft. 
          • Students should glue the landforms down to a piece of cardstock or cardboard starting with the background and moving to the foreground. 
          • Students should use overlapping as they glue each layer down.
        • Once they have created their landscapes, students will create a rubbing by placing a piece of computer paper over their landscape. Using a crayon or oil pastel, they will rub across the surface to pick up the texture of the landscape.
      • Students can then add in details and additional texture using colored pencil, crayon, or oil pastel.


      Closing Reflection

      • Students will write a one paragraph artist statement about their work. They should include a relevant title for their landscape and what they showed in their artwork citing text evidence from both sources.
      • Allow students to conduct a gallery walk within small groups to compare and contrast how they and their classmates visualized the text. Emphasize that students should look for similarities and differences in artwork and how that reflects the sources that students used.

      Assessments

      Formative

      Teachers will assess learning by determining whether students are able to identify the background, middle ground, and foreground in the example landscape and whether students can identify all the important supporting details from both texts that describe how the region looks.


      Summative

      CHECKLIST

      • Students’ landscapes included a background, middle ground, and foreground. 
      • Students’ landscapes visualize the details from both texts that describe how the location looks.
      • Students’ artist statements include a relevant title for their landscapes and what they showed in their artwork citing text evidence from both sources.


      Differentiation

      Acceleration: 

      • Allow students to research the landscape paintings of Vincent Van Gogh or another landscape artist. Students can create their artwork in the style of Van Gogh (Post-Impressionism) or another artist of their choice. 

      Remediation: 

      • Allow students to work with partners to create their landscapes. Each partner can create their own rubbing. 
      • Provide students with an “answer key” of the passage to use to check their annotations. 
      • Have students only use one text rather than two.
      • Provide students with a graphic organizer to fill out with landforms, physical features, and agriculture as they read the text. 


       ADDITIONAL RESOURCES


      *This integrated lesson provides differentiated ideas and activities for educators that are aligned to a sampling of standards. Standards referenced at the time of publishing may differ based on each state’s adoption of new standards.

      Ideas contributed by:  Katy Betts 

      Revised and copyright:  2023  @ ArtsNOW


      ARTISTIC EXPLORATIONS 6-8


      ARTISTIC EXPLORATIONS 

      ARTISTIC EXPLORATIONS

      Learning Description

      In this lesson, students will learn about how portrait artists convey characteristics through color and style. Students will then use what they learned to create an artwork to express the changes that a character in a text undergoes due to a conflict or event in the text.


      Learning Targets

      GRADE BAND: 6-8
      CONTENT FOCUS: VISUAL ARTS & ELA
      LESSON DOWNLOADS:

      Download PDF of this Lesson

      "I Can" Statements

      “I Can…”

      • I can identify and explain how a character changes throughout a text due to a conflict or event. 

      • I can use color and style to describe a character in a text.

      Essential Questions

      • How does a character change throughout a text due to a conflict or event? 

      • How can I use color and style to describe a character in a text?


      Georgia Standards

      Curriculum Standards

      Grade 6

      ELAGSE6RL3 Describe how a particular story’s or drama’s plot unfolds in a series of episodes as well as how the characters respond or change as the plot moves towards a resolution.


      Grade 7

      ELAGSE7RL3 Analyze how particular elements of a story or drama interact (e.g., how settings shape the characters or plot).

      ELAGSE7RL6 Analyze how an author develops and contrasts the points of view of different characters or narrators in a text.


      Grade 8

      ELAGSE8RL3 Analyze how particular lines of dialogue or incidents in a story or drama propel the action, reveal aspects of a character, or provoke a decision.


      Arts Standards

      Grade 6

      VA6.CR.1 Visualize and generate ideas for creating works of art.

      VA6.CR.2 Choose from a range of materials and/or methods of traditional and contemporary artistic practices to plan and create works of art.

      VA6.CR.3 Engage in an array of processes, media, techniques, and/or technology through experimentation, practice, and persistence.

      VA6.CR.4 Incorporate formal and informal components to create works of art.


      Grade 7

      VA7.CR.1 Visualize and generate ideas for creating works of art.

      VA7.CR.2 Choose from a range of materials and/or methods of traditional and contemporary artistic practices to plan and create works of art.

      VA7.CR.3 Engage in an array of processes, media, techniques, and/or technology through experimentation, practice, and persistence.

      VA7.CR.4 Incorporate formal and informal components to create works of art.


      Grade 8

      VA8.CR.1 Visualize and generate ideas for creating works of art.

      VA8.CR.2 Choose from a range of materials and/or methods of traditional and contemporary artistic practices to plan and create works of art.

      VA8.CR.3 Engage in an array of processes, media, techniques, and/or technology through experimentation, practice, and persistence.

      VA8.CR.4 Incorporate formal and informal components to create works of art.


      South Carolina Standards

      Curriculum Standards

      Grade 6

      Standard 8: Analyze characters, settings, events, and ideas as they develop and interact within a particular context.

      8.1 Describe how a plot in a narrative or drama unfolds and how characters respond or change as the plot moves toward a resolution; determine the impact of contextual influences on setting, plot and characters.

      Grade 7

      Standard 8: Analyze characters, settings, events, and ideas as they develop and interact within a particular context.

      8.1 Analyze how setting shapes the characters and/or plot and how particular elements of a narrative or drama interact; determine the impact of contextual influences on setting, plot, and characters. 

      Grade 8

      Standard 6: Summarize key details and ideas to support analysis of thematic development.

      6.1 Determine one or more themes and analyze the development and relationships to character, setting, and plot over the course of a text; provide an objective summary.

      Standard 8: Analyze characters, settings, events, and ideas as they develop and interact within a particular context.


      Arts Standards

      Artistic Processes: Creating-I can make artwork using a variety of materials, techniques, and processes.

      Anchor Standard 1: I can use the elements and principles of art to create artwork.Anchor Standard 2: I can use different materials, techniques, and processes to make art.

      Artistic Processes: Responding- I can evaluate and communicate about the meaning in my artwork and the artwork of others.

      Anchor Standard 5: I can interpret (read) and evaluate the meaning of an artwork.

      Artistic Processes: Connecting- I can relate artistic ideas and work with personal meaning and external context.Anchor Standard 7: I can relate visual arts ideas to other arts disciplines, content areas, and careers.


      Key Vocabulary

      Content Vocabulary

      • Characterization - The process throughwhich an author develops anddescribes the personalities of thecharacters in a story
      • Theme - A central or underlying idea ormessage that the author conveys
      • Point of view - The perspective fromwhich a story is narrated or presented
      • Perspective - An individual's particularway of seeing, understanding, orinterpreting something
      • Internal conflict - When a characterexperiences a struggle or dilemmawithin themselves
      • External conflict - The struggle or clashbetween a character and an externalforce, which can be another character,society, nature, or


      Arts Vocabulary

      • Color - One of the seven elements of art; reflected or absorbed light
      • Style - The distinctive and recognizable way in which an artist expresses themselves through their artwork
      • Subject - The primary object, scene, or concept that the artwork is about
      • Portrait - An artist’s depiction of a person


      Materials

        • Pencils
        • Scissors
        • Tape or glue sticks
        • Colored pencils and/or markers
        • Blank color wheel
        • Cube template
        • Color and Feelings/characteristics graphic organizer


        Instructional Design

        Opening/Activating Strategy

        • Organize students in small groups of 2-3. Give each group a copy of one of the following artworks. Multiple groups can have the same image. 

        The Scream by Edvard Munch 

        Weeping Woman by Pablo Picasso 

        Rembrandt Laughing by Rembrandt van Rijn 

        Self Portrait in a Cap by Rembrandt van Rijn 

        Sorrowing old man ('At Eternity's Gate') by Vincent Van Gogh 

        • Ask students to identify and write down what they think the person in the artwork might be thinking and feeling. Direct students’ attention to the style, color, and subject of the artwork. 
        • Then, ask students to write down how they came to that conclusion using evidence from the image. Encourage students to talk about how the artist uses color. 
        • Project each of the images on the board. Students will share their conclusions with the class. 
        • Explain to students that they will be creating artwork that shows how a character in a literary work changes over the course of the text.


        Work Session

        • Review perspective and point of view with students. 
        • Each student should select a character from the text being studied. 
        • Students should determine what the catalyst for change is that the character experiences in the text, such as an internal or external conflict, a specific event, etc. 
        • Show students an image of a color wheel. Tell students that color can communicate different things to different people, and that artists use color as a means of 

        communication. Show students Woman with Folded Arms by Pablo Picasso. Ask students how Picasso uses color as a tool of communication. 

        • Provide each student with a blank color wheel. In the same small groups at the activating strategy, have students label their color wheels with the colors and the 

        feelings/characteristics they associate with that color. Students can use multiple words for each color. Use blue as an example–it can represent sadness, melancholy, calm, peacefulness, etc. 

        • Next, pass out cube templates. Tell students that they will write a summary of the event, conflict, etc. that propelled change in the character on the bottom inside of what will become the cube/box. 
        • On each of what will be the sides of the cube, students should briefly explain how the character changed due to the event, conflict, etc. See here
        • Next, students will create four artworks on the reverse side of each character change explanation that illustrate the character of choice at four different points in the text. Each artwork should represent the character at different points in the text as he/she has changed. These will be on the outside of the cube/box when the box is constructed. See here.

        ○ Students should think about how artists from the activator portrayed different characteristics and emotions. 

        ○ Students should also use their color wheels to help them determine what colors they will use in each illustration. 

        ● Finally, students should use tape or glue to put the cube together. Artwork should be on the outside of the cube and explanations on the inside. See here.

        Closing Reflection

        Group students in groups of 4-5. Students should see if they can determine which character from the text each of their classmates selected for their artwork. 

        Then, students should present their artwork stating which character they selected, identifying the catalyst for change, and explaining how each of their illustrations show the change the character experienced.

        Assessments

        Formative

        Teachers will assess understanding through the following questions: 

        • Are students able to explain how artists communicate characteristics and emotions visually? 
        • Are students able to identify an event or conflict that leads to change in a character and explain how that character changes over the course of the text? 
        • Are students able to connect color to emotions/characteristics?


        Summative

        CHECKLIST 

        • Does students’ artwork: 

        ○ Identify the event or conflict that leads to change in a character? 

        ○ Demonstrate visually and verbally how the character changes throughout the text? ○ Use color to communicate feelings and characteristics of the character? ● Are students able to present their artwork stating which character they selected, identifying the catalyst for change, and explaining how each of their illustrations show the change the character experienced?

        Differentiation

        Acceleration: Students should select one of the artworks discussed in class. Students should conduct an independent study on the artwork and artist. Students should create their artwork in the style of this artist. 

        Remediation: 

        ● Allow students to orally explain how the event or conflict changed the character. ● Allow students to use bullet points or a numbered list to explain how the event or conflict changed the character. 

        ● Allow students to work in small groups on the same artwork and character. Each student can create one small artwork that they will cut out and glue onto the box to make the collaborative artwork.


        ADDITIONAL RESOURCES 

        ● Artworks: 

        Woman with Folded Arms by Pablo Picasso 

        The Scream by Edvard Munch 

        Weeping Woman by Pablo Picasso 

        Rembrandt Laughing by Rembrandt van Rijn 

        Self Portrait in a Cap by Rembrandt van Rijn 

        Sorrowing old man ('At Eternity's Gate') by Vincent Van Gogh 

        Cube template 

        Color wheel 

        Color and Feelings/characteristics graphic organizer


        *This integrated lesson provides differentiated ideas and activities for educators that are aligned to a sampling of standards. Standards referenced at the time of publishing may differ based on each state’s adoption of new standards. 

        Ideas contributed by: Katy Betts 

        Revised and copyright: 2024 @ ArtsNOW

        Grades 6-8:
        Circuitry & Dance

        DANCE

        Circuitry & Dance

        Program Description

        This program was originally a 6-day unit on circuitry and dance. Because of Covid-19, it was adjusted to fit a virtual audience. Students looked at the elements of dance through the concept of a simple circuit.


        Learning Targets

        “I Can…”

        • Explain how a circuit works.
        • Explain the elements of a circuit and how they work together.
        • Relate the elements of a circuit to dance elements.
        • Communicate a message through choreography and movement.

        Essential Questions

        • How are circuits & choreography related?
        • How can I use movement to illustrate the concept of a simple circuit?

        Curriculum Standards

        S5P2. Obtain, evaluate, and communicate information to investigate electricity.
        b. Design a complete, simple electric circuit, and explain all necessary components.
        c. Plan and carry out investigations on common materials to determine if they are insulators or conductors of electricity.

        S8P2. Obtain, evaluate, and communicate information about the law of conservation of energy to develop arguments that energy can transform from one form to another within a system.
        b. Plan and carry out an investigation to explain the transformation between kinetic and potential energy within a system (e.g., roller coasters, pendulums, rubber bands, etc.).
        d. Plan and carry out investigations on the effects of heat transfer on molecular motion as it relates to the collision of atoms (conduction), through space (radiation), or in currents in a liquid or a gas (convection).


        Arts Standards

        ESD4.CR.1 Demonstrate an understanding of the choreographic process. 


        1. Explore a variety of choreographic structures, forms, and designs (e.g. AB, ABA, canon, call-response, narrative, complementary/contrasting shapes, symmetry).
        2. Demonstrate proper dance technique while performing choreography.

        Implement the use of props within choreography.


        ESD4.CR.2 Demonstrate an understanding of dance as a form of communication.


        a. Use movement to express an idea or feeling.

        b. Understand how theatrical elements (e.g. costuming, lighting) contribute to the meaning of dance.

        Content Vocabulary

        • Source: A supply of moving electrons
        • Voltage: electromotive force or potential difference expressed in volts.
        • Resistance: A physical property of materials. If a material has a high resistance, it opposes the passage of a steady electric current. The lower the resistance, the easier it is to force electrons to leave atoms and move through the material.
        • Load: A component that consumes power supplied by a power source.
        • Current:  the time rate of flow of electric charge
        • Wire: filament made of flexible metal
        • Conductor: creates a pathway for electrons
        • Insulator:  prevents the flow of electrons
        • Pathway: a path, course, route, or way for an electrical current to flow

        Arts Vocabulary

        • Level: one of the aspects of movement (high, middle, low)
        • Pathway: designs traced on the floor or through the air as a dancer moves through space.
        • Sustained Movement: smooth and unaccented.
        • Suspended Movement: occurs in a moment of resistance to gravity.
        • Percussive Movement: movement with sharp starts and stops.
        • Vibratory Movement: movement with rapid, repeated bursts of energy.
        • Swimming Movement: movement with a repeated cycle of fall and recovery like a pendulum.
        • Locomotor: movement that travels through space.
        • Non-Locomotor: movement that does not travel through space.

        Summative Assessment

        • Students create a paper circuit that works using series circuit concepts.
        • Students create a wearable circuit using the LilyPad Arduinos and conductive thread.
        • Students create choreography that demonstrates the concept of energy traveling through a circuit

        Materials

        • LEDs
        • Copper Tape
        • Paper (card stock*, copy paper, construction paper)
        • Coin Cell Batteries (one per person)
        • Conductive Thread
        • Lilypad LEDs
        • Felt
        • Thread
        • Sewing Needles
        • Battery holders
        • Makey Makeys

        *preferred

        Visual Arts Activating Strategy (5-10 min)

        Each day we began our class with a 15-minute dance-inspired warm-up exercise. The purpose of this activating strategy is to get their heart rates up and have them working with some of the dance skills we will be using throughout the program.


        Visual Arts Main Activity

        PROCESS:


        Day 1:

        • Warm up
        • Group discussions “What is a circuit”
          • This discussion focused on a simple circuit (switch, wire, power source, load)
        • Group tested out ideas of what each element would look like as a movement.
        • Group discussed Alternating Currents vs Direct Current.
        • Group created a circuit movement inspired by an Alternating Current Circuit.  Each element in the circuit was expressed through movement and put together to form simple choreography.
        • STEM Connection
          • Students created “Paper Circuits” using copper tape, an LED, and a coin cell battery. This demonstrated the simple circuit we learned about.


        Day 2:

        • Warm up
        • Group review of “What is a circuit”
        • Students performed group choreography illustrating AC created the previous day.
        • Group discussed Source, Voltage, Resistance, and Load.
        • Each student created a movement to represent each of these vocabulary words.
        • Students taught each other their movements.
        • Students were assigned to practice overnight.
        • STEM Connection
          • Students used various objects to explore with Makey Makeys.


        Day 3:

        • Warm up
        • Group review of “What is a circuit” and shared what they created the day before.
        • Teacher put the choreography together and students created and practiced a dance to illustrate the power of circuitry.
        • Students used an Electric Circuit toy to create a human circuit as part of their choreography.
        • Students listened to various songs to choose the music that best related to their choreography.
        • STEM Connection
          • Students learned about wearable circuits and began working on their own design.


        Day 4 (Online):

        • Warm up/ Introduce specific dance movement (~30 minutes) (Clip)
        • Group review of circuitry vocabulary.
        • Students were given 5 minutes to create a new movement for their circuit vocabulary.
        • Students shared out.
        • Group review of what was in their bags (Felt, Coin Cell Batteries (one per person), Conductive Thread, Lilypad LEDs, Felt, Thread, Sewing Needles, & Battery holders for the long-term project to create a wearable circuit)


        Day 5:

        • Warm up/ Introduce specific dance movement (~30 minutes)
        • Group review of circuitry vocabulary.
        • Group review of paper circuits and Series vs Parallel circuits.
        • Students created “Positivity Posters” using the Paper Circuits
        • Students also created movements that represent the message conveyed in the Positivity Poster.
        • Demonstration of how to create a paper circuit. (Clip)


        Day 6:

        • Warm up: Students are led through a warmup
        • Vocabulary review in choreography- Source, current Load current source
        • Student shared Positivity Poster and Choreography (Clip)
        • Group Performed student choreography (Clip)


        Reflection Questions

        • What do we know about circuits?
        • How did our paper circuits reflect our choreography?
        • How did your positivity poster and choreography work together?


        Additional Resources


        Grades 4-8:
        Light and Sound

        VISUAL ARTS

        Light & Sound

        Description

        In this program, we investigated Light and Sound through STEM activities, visual art, music, and dance.


        Learning Targets

        “I Can…”

        • Explain reflection and refraction.
        • Explain how pixels work together to give off colors.
        • Describe how sound waves move and how frequency is related to the sound an object produces..
        • Show how lighting and sound affects a piece of choreography.
        • Demonstrated how transparent, translucent, and opaque work together in visual art.

        Essential Questions

        • How can I obtain, evaluate, and communicate information about the nature of light and how light interacts with objects?
        • How can I obtain, evaluate, and communicate information about how sound is produced and changed and how sound and/ or light can be used to communicate?
        • How can I develop and use a model to compare and contrast how light and sound waves are reflected, refracted, or absorbed through various materials?
        • How can I develop and use a model to illustrate how transparent, translucent, and opaque materials work in relation to light?

        Curriculum Standards

        S4P1. Obtain, evaluate, and communicate information about the nature of light and how light interacts with objects.


        1. Plan and carry out investigations to observe and record how light interacts with various materials to classify them as opaque, transparent, or translucent.
        2. Plan and carry out investigations to describe the path light travels from a light source to a mirror and how it is reflected by the mirror using different angles.
        3. Plan and carry out an investigation utilizing everyday materials to explore examples of when light is refracted. (Clarification statement: Everyday materials could include prisms, eyeglasses, and a glass of water.

        S4P2. Obtain, evaluate, and communicate information about how sound is produced and changed and how sound and/or light can be used to communicate.


        1. Plan and carry out an investigation utilizing everyday objects to produce sound and predict the effects of changing the strength or speed of vibrations.
        2. Design and construct a device to communicate across a distance using light and/or sound.

        S8P4. Obtain, evaluate, and communicate information to support the claim that electromagnetic (light) waves behave differently than mechanical (sound) waves.


        1. Develop and use a model to compare and contrast how light and sound waves are reflected, refracted, absorbed, diffracted or transmitted through various materials. (Clarification statement: Include echo and how color is seen but do not cover interference and scattering.)


        Arts Standards

        VA4.CR.1 Engage in the creative process to generate and visualize ideas by using subject matter and symbols to communicate meaning.

        VA4.CR.2 Create works of art based on selected themes.

        VA4.CN.3 Develop life skills through the study and production of art (e.g. collaboration, creativity, critical thinking, communication).

        VA5.PR.1 Plan and participate in appropriate exhibition(s) of works of art to develop the identity of self as artist.

        VA5.CN.3 Develop life skills through the study and production of art (e.g. collaboration, creativity, critical thinking, communication).

        VA6.CR.1 Visualize and generate ideas for creating works of art.

        VA6.CR.3 Engage in an array of processes, media, techniques, and/or technology through experimentation, practice, and persistence.

        VA6.CR.6 Keep an ongoing visual and verbal record to explore and develop works of art.

        VA6.PR.1 Plan, prepare, and present completed works of art.

        VA7.CR.1 Visualize and generate ideas for creating works of art.

        VA7.CR.2 Choose from a range of materials and/or methods of traditional and contemporary artistic practices to plan and create works of art.

        VA7.CR.3 Engage in an array of processes, media, techniques, and/or technology through experimentation, practice, and persistence.

        VA7.PR.1 Plan, prepare, and present completed works of art

        VA8.CR.1 Visualize and generate ideas for creating works of art.

        VA8.CR.2 Choose from a range of materials and/or methods of traditional and contemporary artistic practices to plan and create works of art.

        VA8.CR.3 Engage in an array of processes, media, techniques, and/or technology through experimentation, practice, and persistence.

        ESD4.CR.1 Demonstrate an understanding of the choreographic process.

        ESD4.CR.2 Demonstrate an understanding of dance as a form of communication.

        ESD4.PR.4 Understand and apply music concepts to dance.

        ESD4.CN.3 Integrate dance into other areas of knowledge.

        ESD5.CR.1 Demonstrate an understanding of the choreographic process.

        ESD5.PR.2 Understand and model dance etiquette as a classroom participant, performer, and observer.

        ESD5.PR.4 Understand and apply music concepts to dance. a. Demonstrate and create movement in response to a variety of musical selections. b. Demonstrate musicality while performing dance phrases.

        ESD5.RE.1 Demonstrate critical and creative thinking in dance.

        MSD.PR.4 Understand and apply music concepts to dance.

        MSD.RE.1 Demonstrate critical and creative thinking in dance.

        MSD.CR.2 Demonstrate an understanding of dance as a form of communication.

        MSD.CN.3 Demonstrate an understanding of dance as it relates to other areas of knowledge.

        ESGM4.CR.1a. Improvise rhythmic question and answer phrases using a variety of sound sources.

        ESGM4.PR.2a. Perform rhythmic patterns with body percussion and a variety of instruments using appropriate technique.

        EESGM4.RE.1c. Identify and classify (e.g. families, ensembles) classroom, orchestral, American folk, and world instruments by sight and sound.

        ESGM4.CN.1b. Discuss connections between music and disciplines outside the fine arts.

        ESGM5.CR.1 Improvise rhythmic phrases.

        ESGM5.PR.2a. Perform rhythmic patterns with body percussion and a variety of instruments using appropriate technique.

        ESGM5.RE.1b. Describe music using appropriate vocabulary (e.g. fortissimo/pianissimo, presto/largo/moderato/allegro/adagio, legato/staccato, major/minor), intervals (e.g. step, skip, repeat, leap), timbre adjectives (e.g. dark/bright), and texture (e.g. unison/harmony).

        ESGM5.RE.1c. Identify and classify (e.g. families, ensembles) classroom, orchestral, American folk and world instruments by sight and sound.

        ESGM5.CN.1b. Discuss connections between music and disciplines outside the fine arts

        MSGM6.RE.1a. Recognize and describe musical events in an aural example using appropriate musical terminology

        MSGM7.CR.1b. Improvise simple rhythmic and melodic variations

        MSGM7.RE.1a. Recognize and describe musical events in an aural example using appropriate musical terminology

        MSGM8.CR.1b. Improvise melodic embellishments and simple rhythmic and melodic variations.

        MSGM8.RE.1a. Recognize and describe musical events in an aural example using appropriate musical terminology


        Content Vocabulary

        • Reflection: the throwing back by a body or surface of light, heat, or sound without absorbing it.
        • Refraction: A change of direction that light undergoes by passing obliquely through one medium.
        • Sound: vibrations that travel through the air or another medium and can be heard when they reach a person's or animal's ear.
        • Sound waves: a vibration of waves by which sound is projected.
        • Pitch: the quality of a sound governed by the rate of vibrations producing it.
        • Frequency: the number of occurrences of a repeating event per unit of time
        • Pixel: an area of illumination on a display screen, many pixels compose an image.
        • Digit: any of the numerals from 0 to 9.
        • Digital: a series of the digits 0 and 1 represented by values of a physical quantity such as voltage.
        • Additive color theory: starts without light (black) and light sources of various wavelengths combine to make a color.
        • Subtractive color theory: starts with light (white), colored inks, paints, or filters between the light source subtract wave lengths from the light, give it color.
        • Binary code: a coding system using the binary digits 0 and 1 to represent a letter, digit, or other character in a computer or other electronic device.
        • Bits: a unit of information expressed as either a 0 or 1 in binary notation.
        • RGB code: the RGB color model is an additive color model in which red, green, and blue light are added together in various ways to reproduce a broad array of colors.
        • Electric circuit: a path in which electrons from a voltage or current source flow.
        • Conductor: a material that transmits heat, electricity, or sound.
        • Insulator: a substance which does not allow the full passage of heat or sound.
        • Open circuit: an electrical circuit that is not complete.
        • Closed circuit: an electrical circuit that is complete.

        Arts Vocabulary

        • Opaque: not able to be seen through; not transparent.
        • Transparent: allowing light to pass through so that objects behind can be distinctly seen.
        • Translucent: allowing light, but not detailed shapes, to pass through; semitransparent.
        • Literal movement: Movements that show exact meaning and actions.
        • Abstract movement: symbolic movement.
        • Choreography: the sequence of steps and movements in dance
        • Levels of Dance (low, middle, high): The three levels in dance movement are high, middle and low.
        • Percussive: This refers to a quality of movement characterized by sharp starts and stops; staccato jabs of energy.
        • Rhythm: a strong, regular, repeated pattern of movement or sound.
        • Mood: atmosphere that evokes certain feelings or vibes
        • Pitch: highness or lowness of sound.
        • Timbre: distinctive quality of sounds; the tone color or special sound that makes one instrument or voice sound different from another.

        Materials

        Materials Provided by Teachers

        • Two Plastic Bottles (approximately 12-16 oz in size)
        • Masking Tape (one roll)
        • Foil (1-2 foil sheets or approximately one foot from a roll)
        • Teaspoon of Uncooked Rice
        • Five rubber bands
        • Ziplock baggies to package materials for students
        • Lamination Pocket, laminated (cut one piece in half, students need ½ apiece)
        • Grid paper
        • One Small Bottle of Food Coloring
        • Alka Seltzer (one tablet per student)
        • Four LED lights
        • Two Coin Battery per student
        • One Bottle of Liquid Glue per student
        • One Piece of Cardstock
        • Journal
        • Pencil
        • Markers
        • CD
        • Flashlight
        • Watercolor paint
        • Watercolor paper
        • Clear tape
        • Kaleidoscope Kit
        • Colored paper (three half-sheets of assorted colors)
        • Plastic sheets (three half-sheets of assorted colors, you may cut plastic notebook dividers for these)
        • One Roll of Plastic tape

        Materials Students Provided at Home

        • Large Box
        • Scissors
        • Bowl
        • Saran Wrap
        • Objects from around the house (tissue boxes, toilet paper tubes, etc.)
        • Salt
        • Newspaper (to protect surfaces)
        • Vegetable oil
        • Shaker Object (pack of tic tacs or bottle of sprinkles, etc.)
        • Grocery Bag

        Activating Strategy (5-10 min)

        Day 1 AM Session:

        • Introduce Light Refraction with Jar & Pencil Activity
          • Fill a clear container with water.
          • Tell the students you will be placing the pencil in the water.
          • Ask the first question.
          • Place the pencil in the water.
          • Give students a few moments to make observations.
        • Ask the following questions:
          • What do you think is going to happen?
          • What do you observe?
          • What do you believe is causing the “bent/ split” pencil illusion?
          • Introduce the word refraction

        Day 1 PM Session:

        • Review the Light Box Magic STEM challenge from the morning session and allow students to discuss their observations/ discoveries
          • How the amount of light in the box may change with different amounts of water, different time of day, blocking the top side of the bottle, etc?
          • Light Box Example
        • Investigate the CD with reflections of light using house lighting and the flashlight provided
          • Possible questions to ask: What shapes and colors do you see in the rainbow?  What do you notice when you use two CDs? What do you notice when you put the flashlight close to the CD?
          • How does the CD act as a prism?
          • Allow students to write their observations in their journals.
          • Investigating Light


        Day 2 AM Session:

        • Ask students the following questions to prompt discussions verbally or in the chat
          • What do you think of when you hear the word sound?
          • What do you think of when you hear the word waves?
        • Discuss that sound is made of vibrations and invisible soundwaves
        • Demonstrate and have students complete dancing sprinkles/ rice activity at the same time to demonstrate how you can “see” soundwaves
        • Sound Waves Example
        • Discuss how sound waves travel, how vibrations are recognized as different sounds, and how the size and shape of the sound waves determine the kind of sound heard.
        • Review various musical instruments, homemade and traditional. Have students compare and predict sounds of these instruments and how the sounds (vibrations) were created.
        • Have students find a way to create sound using objects around them and improvise an 8-beat pattern using that object.
        • Have students create an 8-beat pattern and repeat it. Add to YouTube backing track.

        Day 2 PM Session:

        • Students will share their instruments they created after the morning STEM challenge.  Play eight beats of music together as a group/ class.
        • Discuss as a class the following questions
          • What is a shadow?
          • How might artists use shadows?
          • Possible answers: to make things look more realistic, to add depth, etc
        • Find a shadow in your house and spend five minutes sketching the object and its shadow in your journal with a pencil.


        Day 3 AM Session:

        • Review shadow sculptures from the end of Day 2
        • Introduce how sound is related to dance
        • Students will watch a clip from Broadway’s STOMP to get students thinking about how sound is used in dance.  Video: STOMP - Established in 1994 NYC
          • Ask students what common household instruments they see in the video.

        Day 3 PM Session:

        • View images of Yayoi Kusama’s work.  Students will discuss in chat what they observe/ notice about her work. (mirrors, reflections, infinity rooms, duplicates, etc)
        • What makes her work unique?
        • What themes do you notice?


        Day 4 AM Session:

        • Introduction to vocabulary words transparent, translucent, and opaque by making a lava lamp. Possible questions to ask:
          • After pouring the water and oil into the glass, what do you believe is going to happen when food coloring is added? Will it mix with the water, oil, or both?
          • What do you observe when you initially add the food coloring?
          • If you continue to add food coloring to the water, will the water stay transparent or translucent?
        • Example

        Day 4 PM Session:

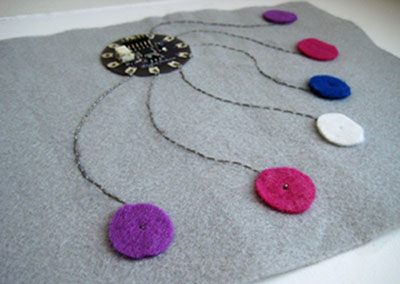
        • Briefly discuss what an electric circuit is and what materials are used/needed to make a complete (closed) circuit
        • Show students how to use a coin battery to illuminate a LED light
        • STEM Challenge: LED Glue/ Salt Circuit
          • Gather materials: half piece of cardstock, coin battery, LED light, glue, salt and tray/ paper plate to work over
          • Fold the corner of your paper up to make a “switch”
          • “Draw” a line using glue from the folded corner of the paper and then towards the edge.  Be generous with the glue
          • Skip a space for your LED and continue your glue line back near the folded corner
          • add your LED to the space making sure the “legs” are in the glue
          • sprinkle a good layer of salt on the glue.  Lift the paper and dump the extra salt on the tray
          • When it is dry, use the coin cell battery to try and light up your LED
          • **The salt circuit is not a very strong circuit. The light will be dim. You may try paper circuits with copper tape for a brighter light.

        Example

        Main Activity

        Day 1 AM Session: 

        • Students were introduced to the concept of light refraction during the activating strategy.
        • Students watched a video “Liter of Light” to be inspired by how light refraction is being used in 3rd World countries to reduce electricity costs for families.
        • Students STEM activity was to create a way to light up a “room” using light refractions.
        • Teachers demonstrated how to create a Light Box to demonstrate this concept.
        • Step 1: Gather your materials
        • Step 2: Fill your bottles with water (Add a few drops of food coloring if you want!)
        • Step 3: Trace the bottom of the bottles on the top of the box and carefully (and with a parent/older siblings help) cut holes.  Put tinfoil on the top of the box, covering the holes. Poke a hole in the foil over the open. This will help the light reflect into the bottles.
        • Step 4: Carefully (and with a parent/older siblings help) cut a hole in the side of the box to look inside.  We recommend cutting a smaller window or just eye holes.
        • Step 5: Push bottles into holes and look in the viewing window.
        • Example

        Adapted from: https://www.trueaimeducation.com/light-box-magic/

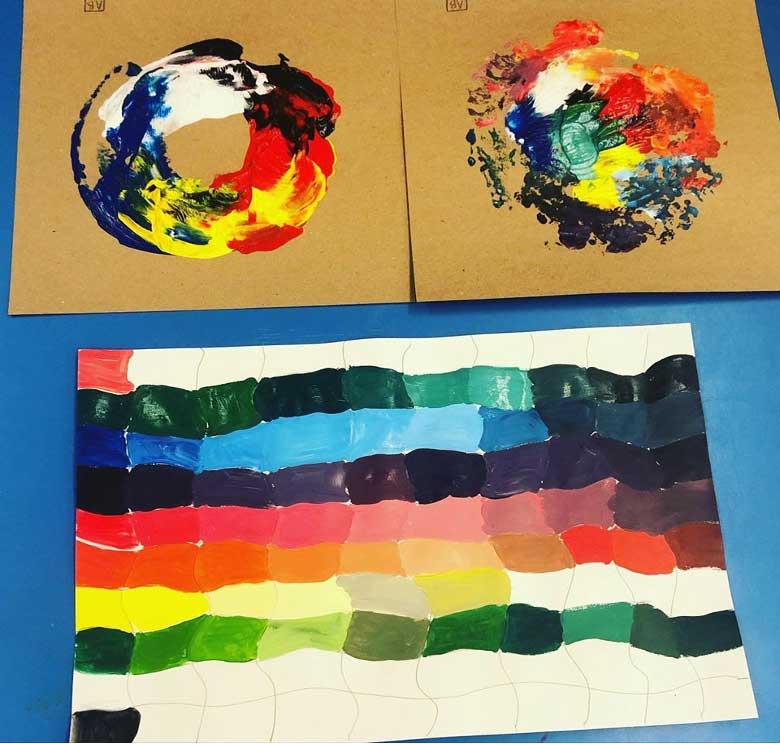
        • Teachers demonstrated the relationship between colors and math (seeing the numbers in digital media). The following topics were discussed:
          • What does the word digital mean?
          • Pixels-comparing LED & LCD close up images of digital screens
          • Additive Color Theory vs Subtractive Color Theory
          • Teacher demonstrates a “large scale pixel” by using three lights (red, green, and blue bulbs)
          • Discuss how every pixel has three parts (red component, green component, and blue component)
          • Discuss how each pixel receives three digital (mathematical) signals--one signal for how much red light, how much green light, and how much blue light
          • Discussion of how number values in ColorMath are based on binary code
          • 8-bit Color: An RGB Code has 3 values (256 possible red values, 256 green values, and 256 blue values)
          • Presentation
        • Students can create their own digital art using https://paintz.app

        Day 1 PM Session:

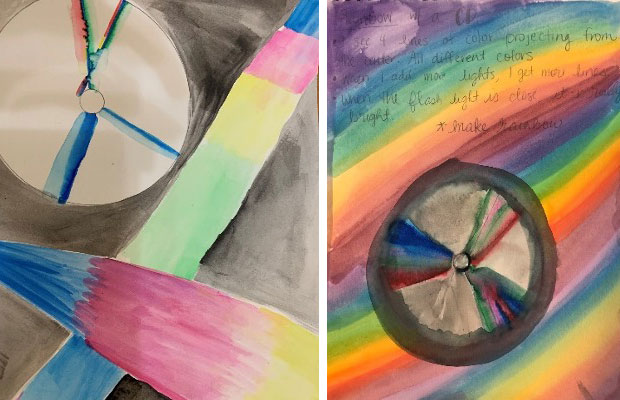
        • Students experimented with a flashlight and CD in the activating strategy.
        • After completing the investigation, instruct students trace the CD on a piece of watercolor paper
        • Students will use markers to draw the “lines/ rainbows” created by the flashlight against the CD.  Students may use their paint brush to paint water on top of the marker to use as a watercolor option (water of the washable markers acts like watercolor.
        • Students may then use the watercolor paint to paint outside of the CD showing what shapes and angles they see when observing the reflection of light against the CD
        • Allow approximately 10-15 minutes for students to paint their observations followed by a share out

        Examples:

        Day 2 AM Session: 

        • After introducing sound and soundwaves in the activating strategy, introduce the vocabulary word pitch.  You may do this by playing different sounds on an instrument
        • Show students a variety of instruments (these may be real instruments or instruments created from household/ classroom objects
        • Example
        • Allow students to find an object to create an instrument out of to play a beat (for example: pencil and water bottle make a drum, using spices/ sprinkles as a shaker)
          • using the instrument they create, play 8 beats together (all playing one note at the same time) followed by 8 beats of 8 counts of a beat of their choice
          • you may do this a few times to allow students to experiment with their instrument
        • STEM Challenge: Create & build your own musical instrument using household items (rubber bands, rice, toilet paper/ paper towel rolls, etc.)
          • students will share out their instruments and play music together at the beginning of their afternoon session

        Day 2 PM Session: 

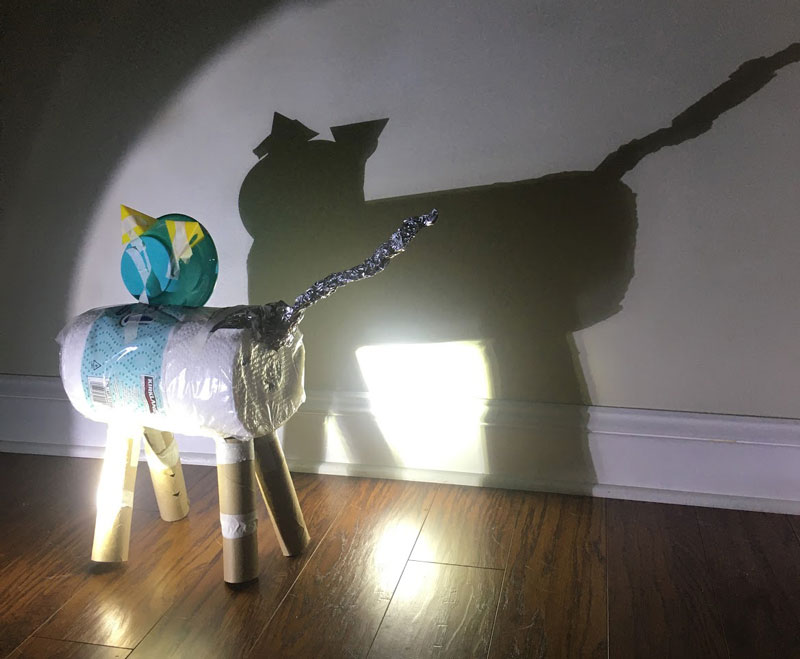
        • After sharing instruments and introducing shadows in the activating strategy, allow students to look at images of shadows made by sculptures
        • Show clip video of (time 1:40-4:00): Tim Noble & Sue Webster, NO - Exhibition & Limited Editions
        • Students are challenged with the task of creating a sculpture with household items that will create an interesting shadow.


        Day 3 AM Session: 

        • After reviewing shadow sculptures and dance clip in the activating strategy, discuss the following:
          • STOMP is performed in theaters, but it is not a play, musical, or opera. It is not theater in the traditional sense of the word. There is no speech, dialogue or plot. However, it does have two characteristics of traditional theater: mime and characterization. Each performer has an individual character which is distinct from the others. These characters are brought out through the mime and dance in the show.
          • The entire show is highly choreographed, interweaving dance into all its aspects. In STOMP, there is a symbiotic relationship between dance and music. The music is created within the dance, but the dance itself is dependent on the music for its rhythm and character. STOMP shows a true marriage of movement and music, where both create and enhance each other.
        • Show second video: How To STOMP: Hands & Feet
          • Play the video a second time and ask students to mimic the dance moves taught in the video.  You may need to replay the video to allow
        • Show third video: How to STOMP: Bags
          • Ask students to create their own rhythm using bags from their house and share out
        • Show fourth video: How to STOMP: Breath Mints
          • Ask students to repeat the rhythm taught using something they can shake from their house (breath mints, spices, sprinkles, etc.)
        • Show fifth video: STOMP Pancakes 1 #StompAtHome
        • Think about all the different ways you made sound and the different ways you saw sound made in the STOMP videos.
          • Why do you think the different props made different sounds?
          • Challenge: Create your own STOMP inspired choreography using found sound.
        • Clip
        • STEM Challenge: Create Your Own Hologram
          • Follow directions of how to make a trapezoid pattern (see picture)
          • Cut out the pattern and trace four trapezoids on your clear plastic sheet
          • Cut out the four trapezoids and tape together four of the perpendicular lines to create a square pyramid.
          • Place your finished hologram on top of the video playing on your device
          • Example 1, Example 2

        Day 3 PM Session:

        • After introducing Kusama’s work and discussing reflections, have students build their kaleidoscope using the kaleidoscope kit.
        • Allow students time to investigate and place different objects in the kaleidoscope to see how it appears.

        Ask students to sketch what they see in their kaleidoscope in their journals

        Day 4 AM Session:

        • Discuss a Lighting Director’s role in dance and show Mark Stanley: Lighting the New York City Ballet
          • Discuss how light gives character to dance and creates the mood
          • Light can also do the following: create space, intensity, shapes, shadows, dimensions, etc.
        • Discuss “What is mood? What are examples?”
          • Possible answers: mood is a literary element that evokes certain feelings or vibes in readers, but can be used the same way in dance
          • Examples of moods:  cheerful, reflective, gloomy, humorous, melancholy, whimsical, romantic, mysterious, ominous, calm, lighthearted, hopeful, angry, fearful, tense
        • Discuss “How can you create mood with lights?”
          • colors (how they mix), shadows (what will happen when things are in front of the lights), angle, intensity, movement of light, layers of light, etc.
        • Watch the following video clips and discuss what you believe the mood is and how did the lighting help create the mood?
        • Dance Challenge: Think about how lighting affected the mood in the various performances and complete the following steps:
          • 1. Pick a mood (for example: cheerful)
          • 2. Create a movement phrase that matches your mood.
          • 3. Are there any adjustments you can make to the lighting in your space to match the mood of your choreography?  Example: brighter lights, dimmer, lights, use shadows, colored light, light coming in at a different angle, light movement.

        Day 4 PM Session:

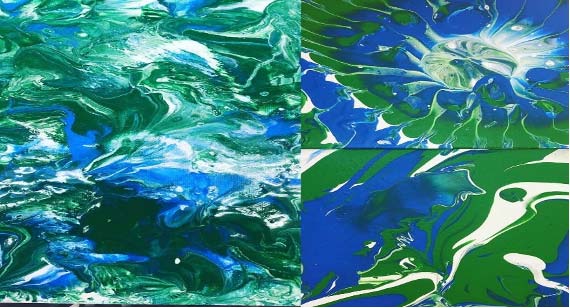
        • After introducing circuits and completing LED salt/ glue circuit, show video clip of Tom Fruin’s work and allow students to type their observations in the chat
        • Ask students, “What do you need to make a shadow?”
          • Possible answers: light source, an object to block the sun, an opaque object, etc.
          • Why are some of the shadows in Tom Fruin’s work different colors?
          • Discuss transparent, translucent and opaque materials and how each respond to light.
        • Sculpture Challenge: Make a 3D sculpture incorporating transparent, translucent and opaque materials inspired by Tom Fruin’s work.

        Here are some snippets of student work throughout the week: VIDEO

        Reflection Questions

        • What colors did you feel worked together and why?
        • What challenges did you have during this process?
        • What tools worked best for your process and why?


        TECHNOLOGY INTEGRATION (Include technology that is integrated directly into the project. Ex: apps, websites for research, virtual field trips, mystery skype calls, etc..)


        Google Meet

        Google Classroom

        Virtual STEM + Arts Summer Camp Slideshow

        Student Activity Slideshow

        Visual Arts Slideshow

        https://musiclab.chromeexperiments.com/Sound-Waves/

        Video: Liter of Light

        Light Magic Box Website

        https://Paintz.app

        Video (timestamp 1:40-4:00): Tim Noble & Sue Webster, NO - Exhibition & Limited Editions

        Video: STOMP - Established in 1994 NYC

        Video: How To STOMP: Hands & Feet

        Video: How to STOMP: Bags

        Video: How to STOMP: Breath Mints

        Video: STOMP Pancakes 1 #StompAtHome

        Video: Fireworks Hologram Video

        Video: Mark Stanley: Lighting the New York City Ballet

        Video: Houston Ballet-Reveal-Garrett Smith Choreography

        Video: “Ounce of Faith” | Trailer | Alvin Ailey American Dance Theater

        Video: Trailer - IN Cognito Full Piece Premiere

        Video: Tom Fruin’s Large-Scale Sculptures, Icons of Brooklyn’s Public Spaces

        https://www.youtube.com/watch?v=85ZptB9kgaM&t=344s

        Grades 6-8:
        Pour Painting

        Pour Painting

        Visual Arts Component - Pour Painting

        Science and Visual Arts

        Description

        In this program, we will explore color, shape, fluidity, and light. Students will have a deeper understanding of how these elements work together to help an artist create their masterpieces. Through this process, students will be able to experiment with flow and shapes to create their artwork.

        Learning Targets

        “I Can…”

        • create shade and tints with paint
        • describe differences between mixing light and mixing paint colors.
        • create works of art using a variety of household tools.

        Essential Questions

        • How do we manipulate our mediums to create abstract art?
        • What effect does shape have on the movement of our medium?

        Curriculum Standards

        S8P1. Obtain, evaluate, and communicate information about the structure and properties of matter. 

        S8P5. Obtain, evaluate, and communicate information about gravity, electricity, and magnetism as major forces acting in nature.

        MGSE6.G.4 Represent three-dimensional figures using nets made up of rectangles and triangles, and use the nets to find the surface area of these figures. Apply these techniques in the context of solving real world and mathematical problems.

        MGSE7.G.6 Solve real-world and mathematical problems involving area, volume and surface area of two- and three-dimensional objects composed of triangles, quadrilaterals, polygons, cubes, and right prisms.


        Arts Standards

        VA4.CR.3 Understand and apply media, techniques, processes, and concepts of two-dimensional art. 

        VA6-8.CR.3 Engage in an array of processes, media, techniques, and/or technology through experimentation, practice, and persistence.

        Content Vocabulary

        • Gravity: the force that attracts a body toward the center of the earth, or toward any other physical body having mass.
        • 3-dimensional shape: a three-dimensional shape can be defined as a solid figure or an object or shape that has three dimensions – length, width and height.
        • Edges: the outside limit of an object, area, or surface; a place or part farthest away from the center of something.
        • Vertices: The common endpoint of two or more rays or line segments.
        • Faces: In any geometric solid that is composed of flat surfaces, each flat surface is called a face. 
        • Elevation: The angle of elevation of an object as seen by an observer is the angle between the horizontal and the line from the object to the observer's eye (the line of sight).
        • Volume: can be defined as the 3-dimensional space enclosed by a boundary or occupied by an object. 
        • Surface Area: The surface area of a solid object is a measure of the total area that the surface of the object occupies.
        • Flow: formalizes the idea of the motion of particles in a fluid. 
        • Viscosity: Viscosity is a physical property of fluids. It shows resistance to flow.

        Arts Vocabulary

        • Value: value refers to the visible lightness or darkness of a color.
        • Shade: a shade is a mixture with black, which increases darkness. 
        • Tint: a tint is a mixture of a color with white, which reduces darkness
        • Primary: are basic colors that can be mixed to produce other colors. They are usually considered to be red, yellow, and blue.
        • Secondary: a color resulting from the mixing of two primary colors.
        • Tertiary: a color produced by an equal mixture of a primary color with a secondary color adjacent to it on the color wheel.

        Summative Assessment

        • Gallery presentation
        • 100 Color Challenge
        • 3-D sculpture 
        • 3-5 Canvas experimentation paintings 
        • Community paint pour
        • property of fluids. It shows resistance to flow.

        Materials

        For Activating Activities

        • Red Light
        • Green Light
        • Blue Light
        • Paper
        • Paper plate
        • Paint (Acrylic)
          • Red
          • Yellow
          • Blue
          • Black
          • White
        • Paint brushes
        • Water
        • Paper towels
        • Pencil

        For Main Activities

        Activating Strategy (5-10 min)

        Mixing Visual Light

        Students went into the Black Box theater and created shadows using colored light. (Red, Green, and Blue) Students were able to see their shadows and what happens when you mix colored light. The result is a colored shadow.

        Light is additive colors

        Primary light colors are Red, Blue, and Green

        • red light + green light makes yellow light
        • red light + blue light makes purple light
        • green light + blue light makes aqua (cyan) light
        • blue light + red light makes pink (magenta) light
        • red + blue + green makes white light

        Clip

        Students theorized what would happen when you mix pigment colors.


        Main Activity

        PROCESS:

        Day 1:

        Mixing Pigments

        • Students participated in the 100 color challenge. Students were given a paper plate with red, yellow, blue, white, and black. Students drew 100 squares on a piece of paper and tried to create 100 different colors from the 3 primary colors plus black and white. 
        • You can discuss shades (adding black) and tints (adding white).

        When students are done with their plates of paint (palette) they can use scrap paper or cardboard to make a fun print! (See Image below)

        Day 2:

        • Finish 100 Color Challenge if needed.
        • Students watched several videos for inspiration for the Acrylic Pour Painting. VIDEO
        • Students explored the MakerSpace to find items to help build their 3-D sculpture.
        • Students used foam board, cardboard, small wooden blocks, small foam blocks, and craft glue to design and build small sculptures.
        • Let the sculptures dry overnight.

        As students finish their sculpture, they can work on their 100 color project or help prepare the acrylic paint & floetrol.

        Day 3:

        • Students prepared their sculpture for the addition of acrylic paint. Students chose colors and added floetrol and water to the acrylic base. This creates a fluid mix that flows easily.
        • Students poured the paint over the sculptures.
        • Students observed the flow of the paint for future paintings.
          • Students used shallow pans to hold their sculptures and collect any excess paint.
        • Clip 1 - Process
        • Clip 2 - Product

        Day 4 & 5:

        • Students chose a variety of canvases and tools and experimented with their paint pours.

        Day 6:

        • Students prepared their work as a Visual Arts Gallery.
        • Students set up a table for visitors to try the 100 color challenge and set up for a community paint pour. This artwork was permanently installed in the school.

        Video Recap of the program (played during the Gallery Opening): Video

        Reflection:

        • What colors did you feel worked together and why?
        • What challenges did you have during this process?
        • What tools worked best for your process and why?

        Instructional Videos

        Classroom Tips:

        • If carpeted room, put down drop cloths or newspaper for painting.
        • Room with no windows works great!

        Reflection Questions

        • What brush worked the best? Why?
        • What did you change or improve on your brush while you were painting?
        • What object helped you create the effect you needed for your type of galaxy?

        Additional Resources

        • Videos of paint pours: Link